What is Multilingual?
As the name suggests, a multilingual website is a website that has content in more than one language. Although they make up most of the global users, English speakers aren’t the only ones using the internet. There are other widely used languages and if you implement them into your website, you’ll be able to reach many more people. Multilingualism on the web has a considerable business advantage. It saves an incredible amount of time and money while delivering a better user experience to larger audiences.
Building a multilingual website is no longer optional for businesses targeting global audiences. Drupal translation capabilities make it easier to deliver content in multiple languages while maintaining consistency and performance. With Drupal’s flexible architecture and support for auto-translation modules, organizations can scale their multilingual strategy efficiently without rebuilding content from scratch.
Steps for enabling the multilingual in your Drupal instance
The prerequisites involve these four Drupal 9 modules.
- Language
- Interface Translation
- Content Translation
- Configuration Translation
Step 1: Enable multilingual modules
First, install the below core modules. navigate to extend the page and install the below modules.


Step 2: Add Language
Navigate to Configuration->Regional and language,
/admin/config/regional/language
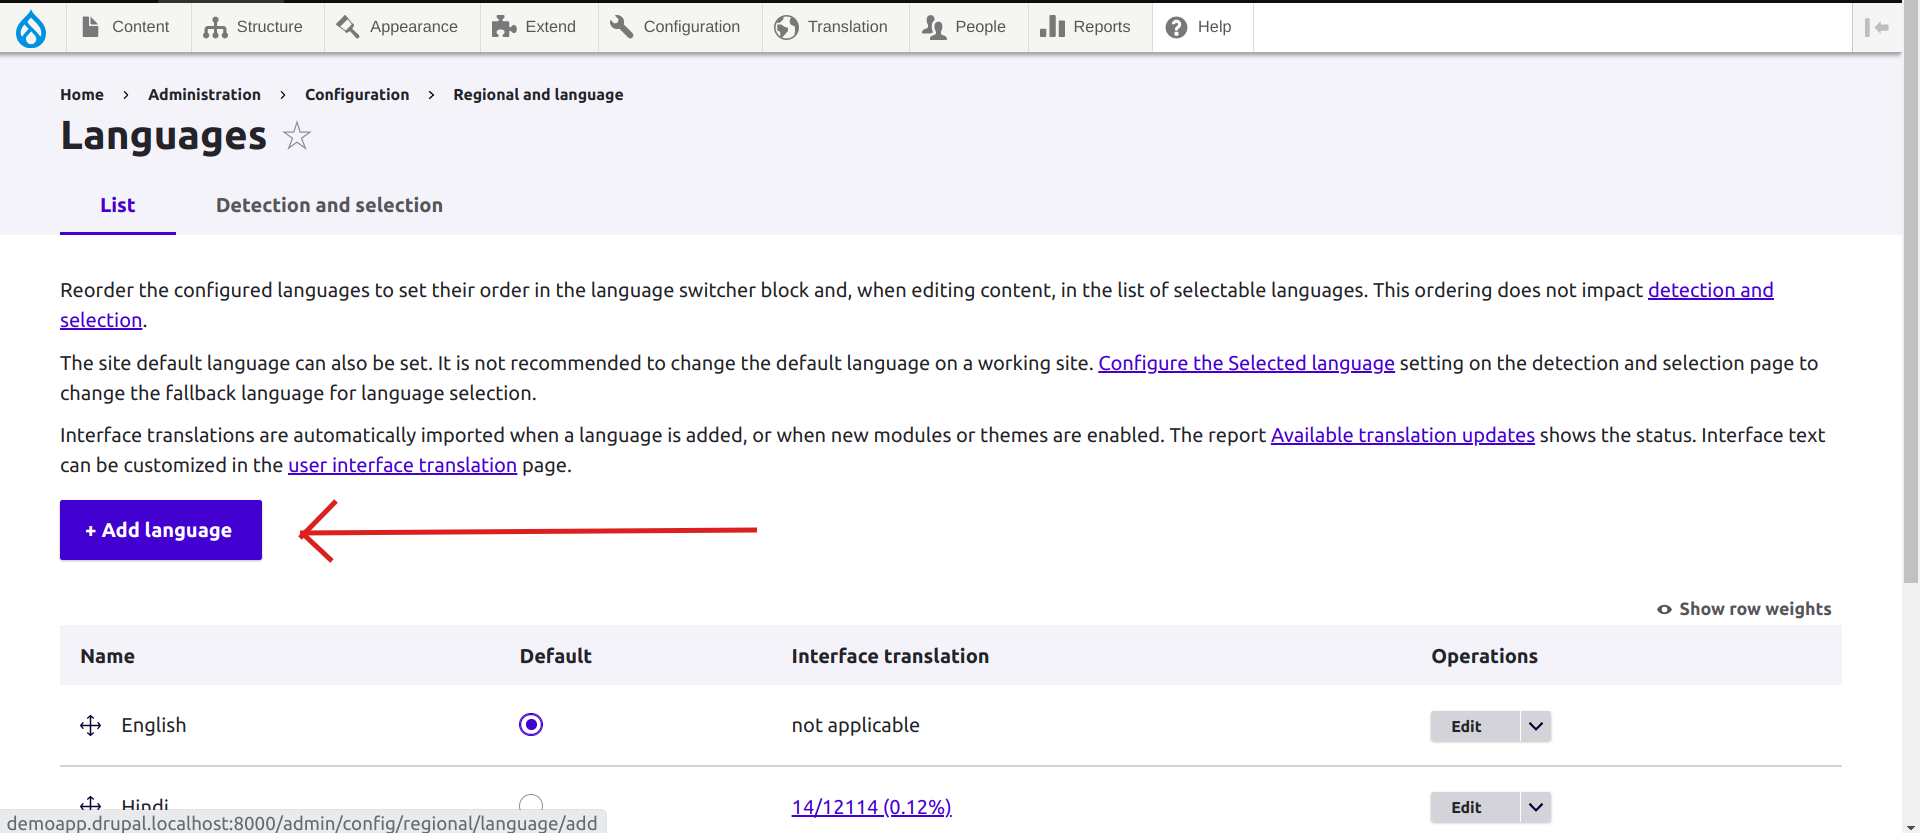
You can add multiple languages here. Add the required languages here and save the configuration.
Step 3: Enable translation in content types
Go to your content type edit page and enable translation in the language settings pages.
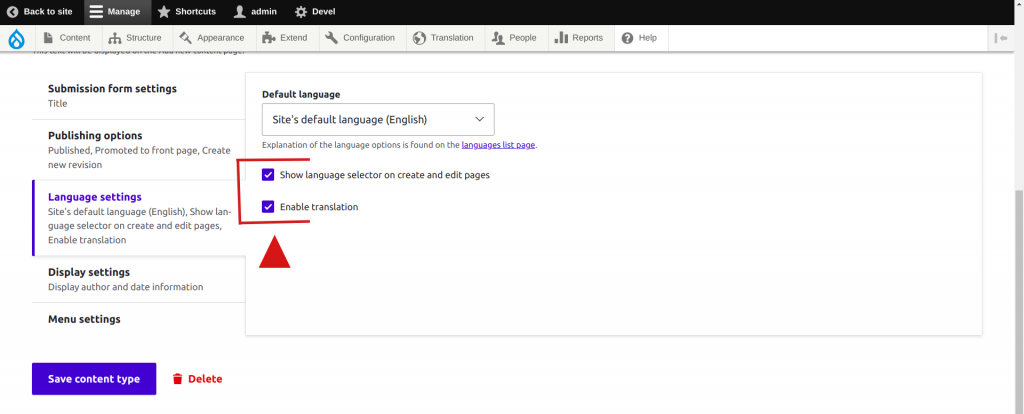
Also, select the check box for showing the language selector.
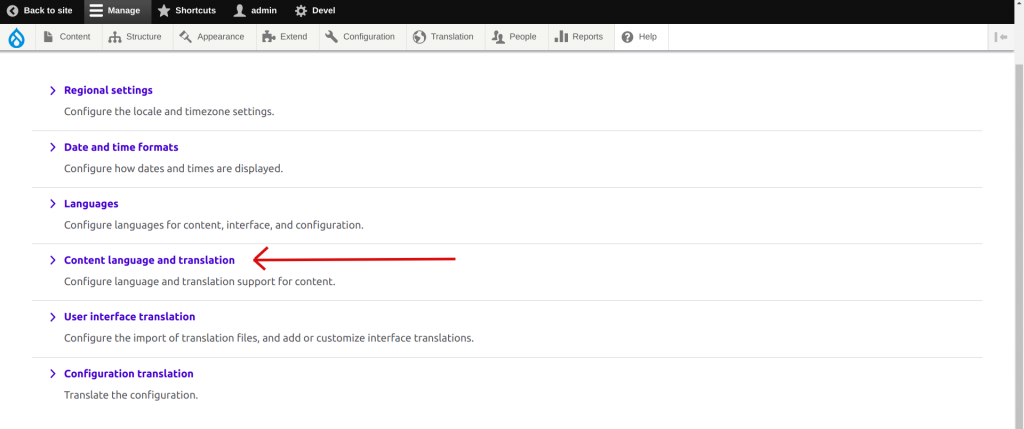
Under configuration, select content language and translation
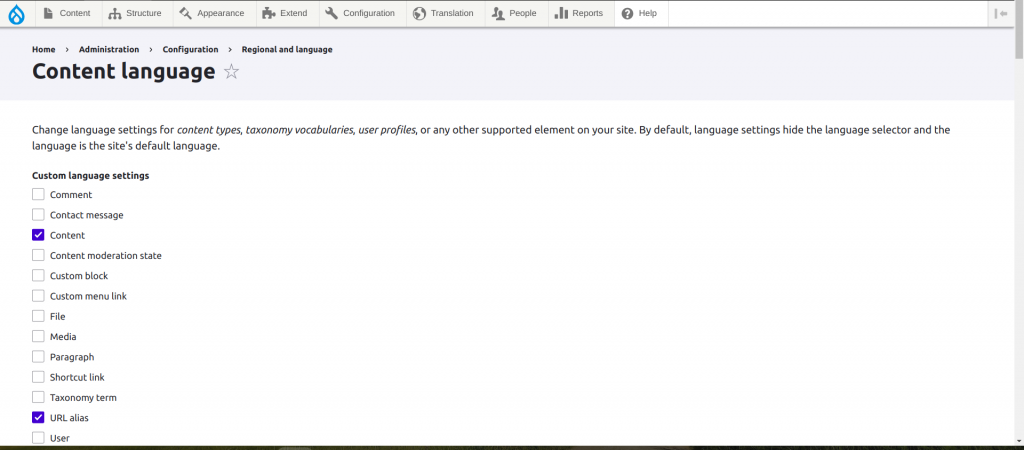
You can decide which field is translatable in each content type. Also, if you have paragraphs, you can decide on translatable fields in paragraphs. You can also select taxonomy and taxonomy fields on this page.
After selecting options, hit the save configuration button.
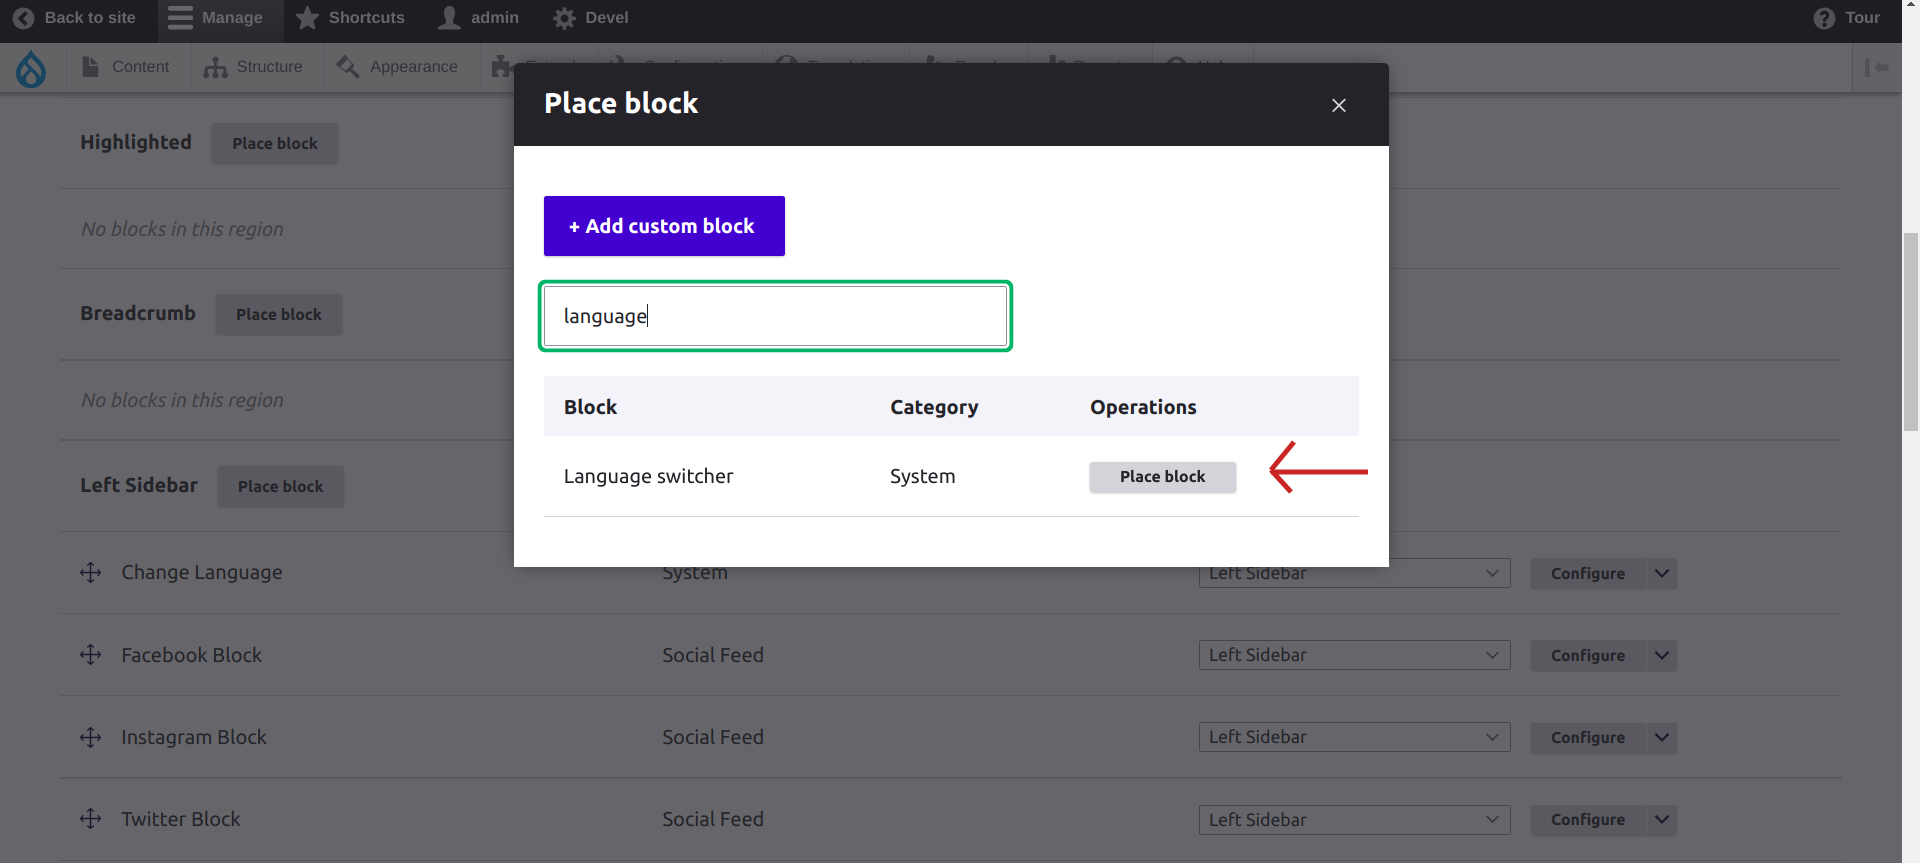
Step 4: Place the Language Switcher Block
Once the language module is installed, the language switcher block will be available by default. It allows the site visitors to switch between languages of their preference.
Place the language switcher block in the desired place on your website. However, this block will not work until you add translations.
You can place language swither in any of the region in your theme.
Go to Structure->block layout
/admin/structure/block

NOTE: “If you want auto-translation functionality on your drupal website please follow the below steps”
How Drupal Website Translation Works with Auto-Translation
Drupal website translation is powered by a combination of core multilingual modules and third-party auto-translation integrations. While Drupal allows you to manage multiple languages natively, auto-translation services help accelerate content localization by translating pages automatically. This approach is especially useful for large websites where manual translation may not be scalable.
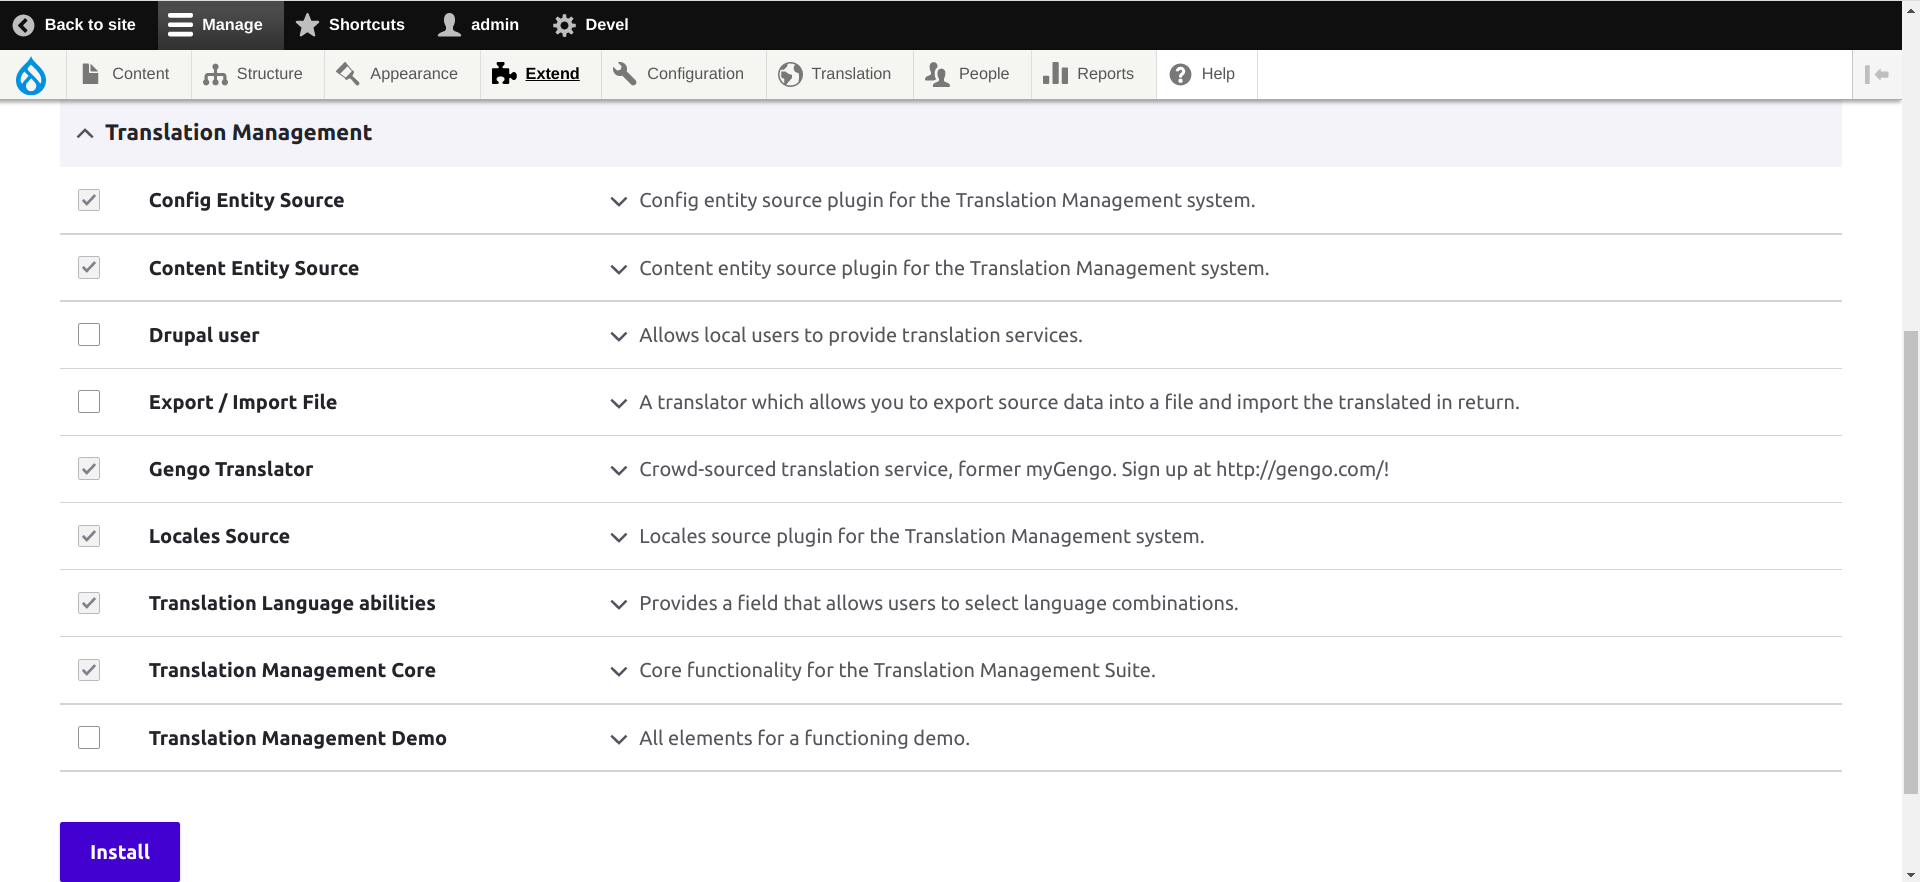
Step 1: Enable the Translation Management Tool Module
The Translation Management Tool (TMGMT) module provides a toolset for translating content from different sources. The translation can be done by people or by translation services of all kinds. It builds on and uses existing language tools and data structures in Drupal and can be used in automated workflow scenarios.
Please Install the Module Using Composer: https://www.drupal.org/project/tmgmt
Translation Services
External translation services can be used for creating a foreign language version of the source text. Or it can be presented to a user for translation. A plugin architecture allows for the integration of additional services.
For the time being you have the choice of these services:
Included
- Export and import via xliff and HTML
- Local Translator (Allows users to translate jobs)
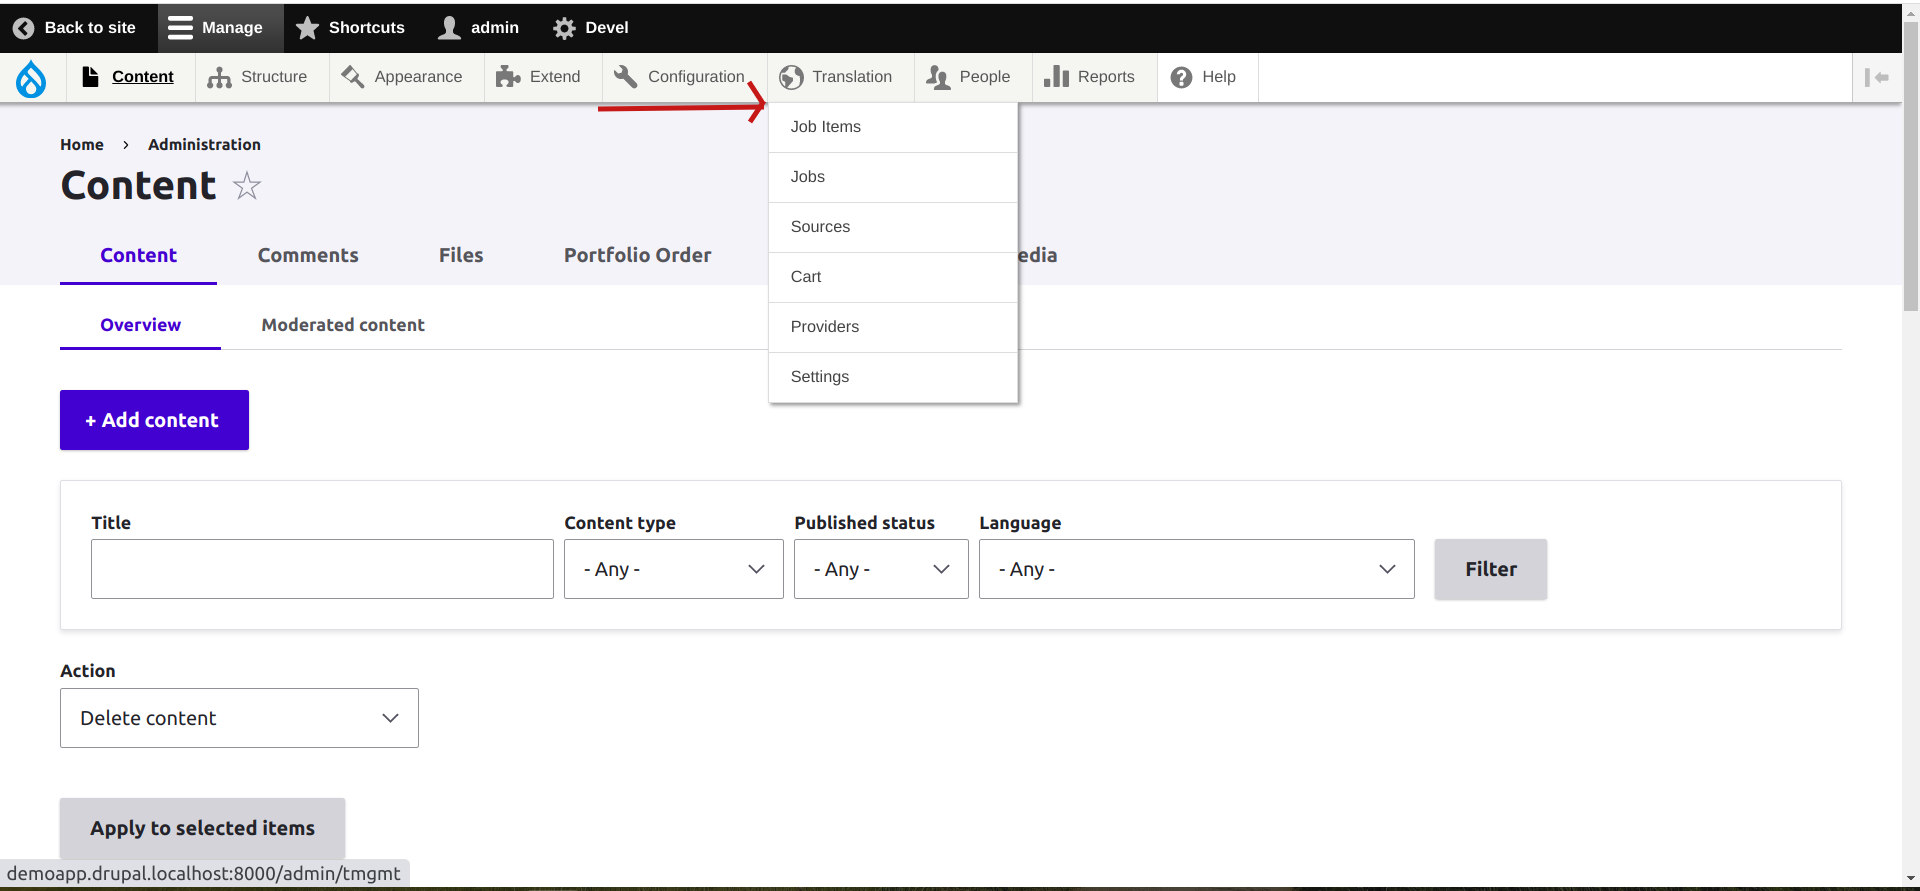
After installation, you can see the Translation link in the menu.
Click on the Translation link. You can see below list of sub menu links.
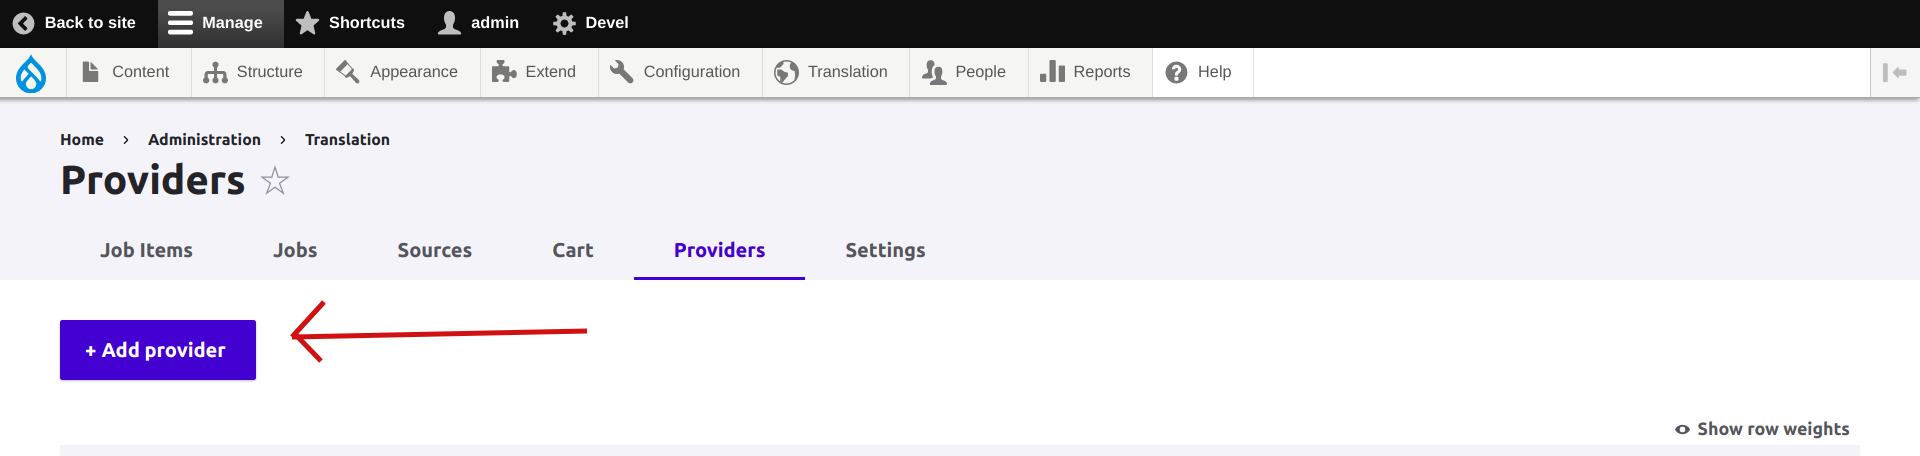
Step 2: Add Provider
To add the best Translatrion Providers, Please follow the below links.
- Google Cloud Translation :- https://cloud.google.com/translate/docs
- Azure Cognitive Services Translator :- https://learn.microsoft.com/en-us/azure/cognitive-services/translator
These are the paid translation providers.
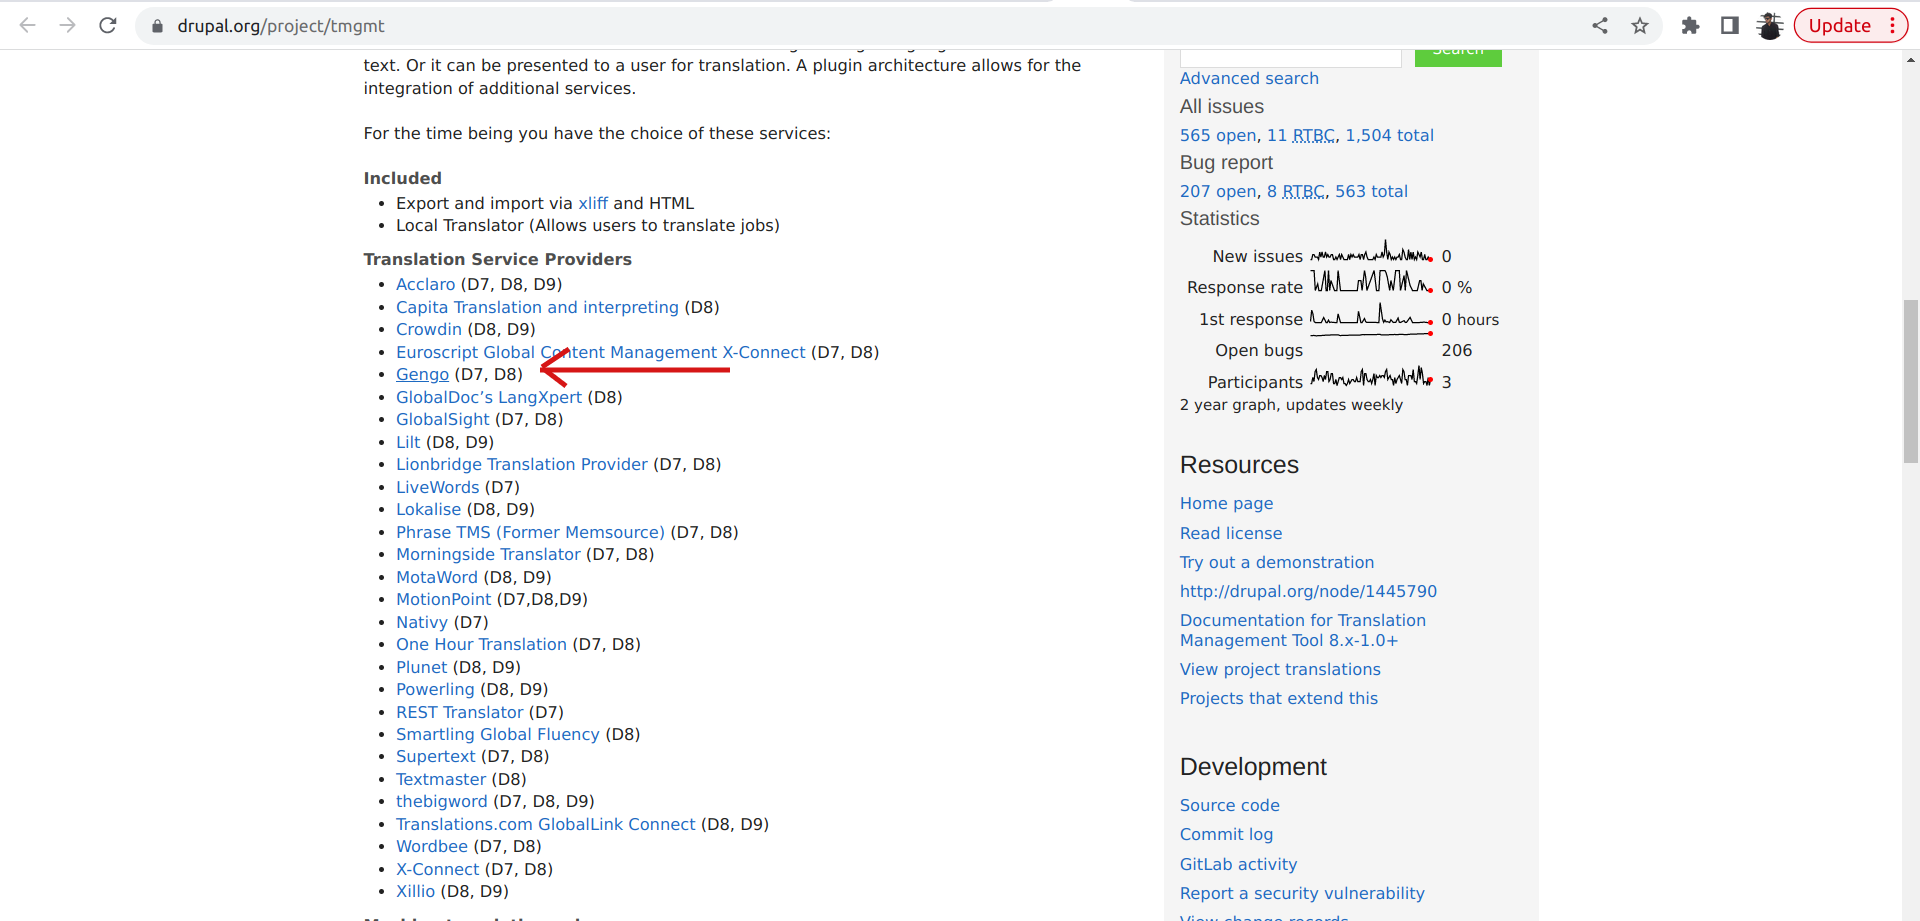
Currently, we are using a free Translation Provider (Gengo):- https://gengo.com/
Please Install the Provider Using Composer: https://www.drupal.org/project/tmgmt_mygengo
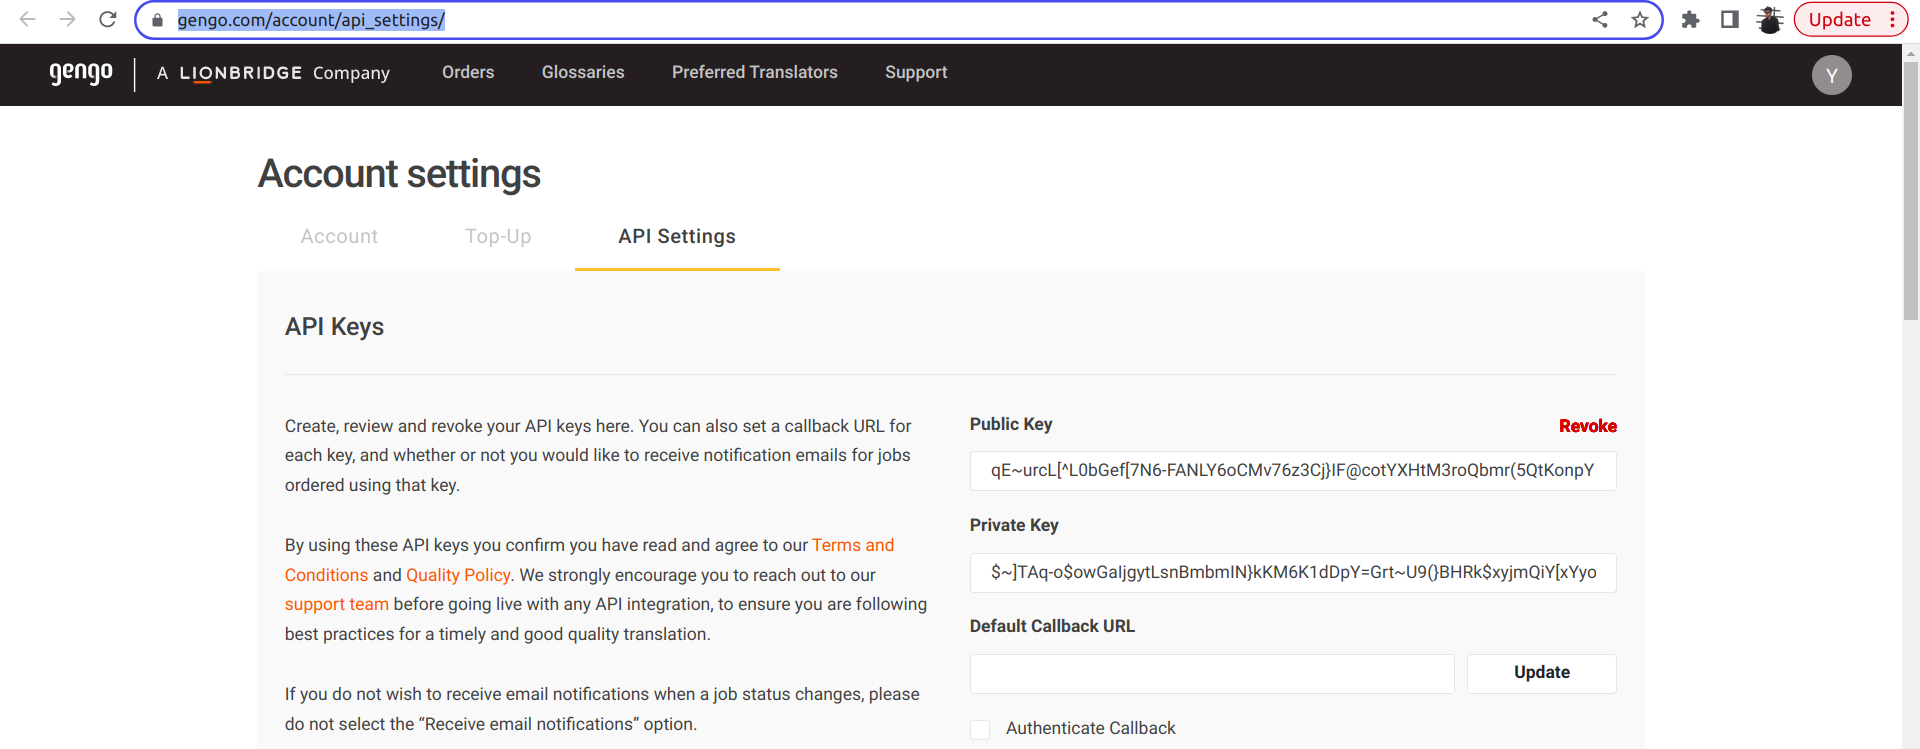
API Settings for Gengo:- https://gengo.com/account/api_settings
/admin/translation/providers/add provider
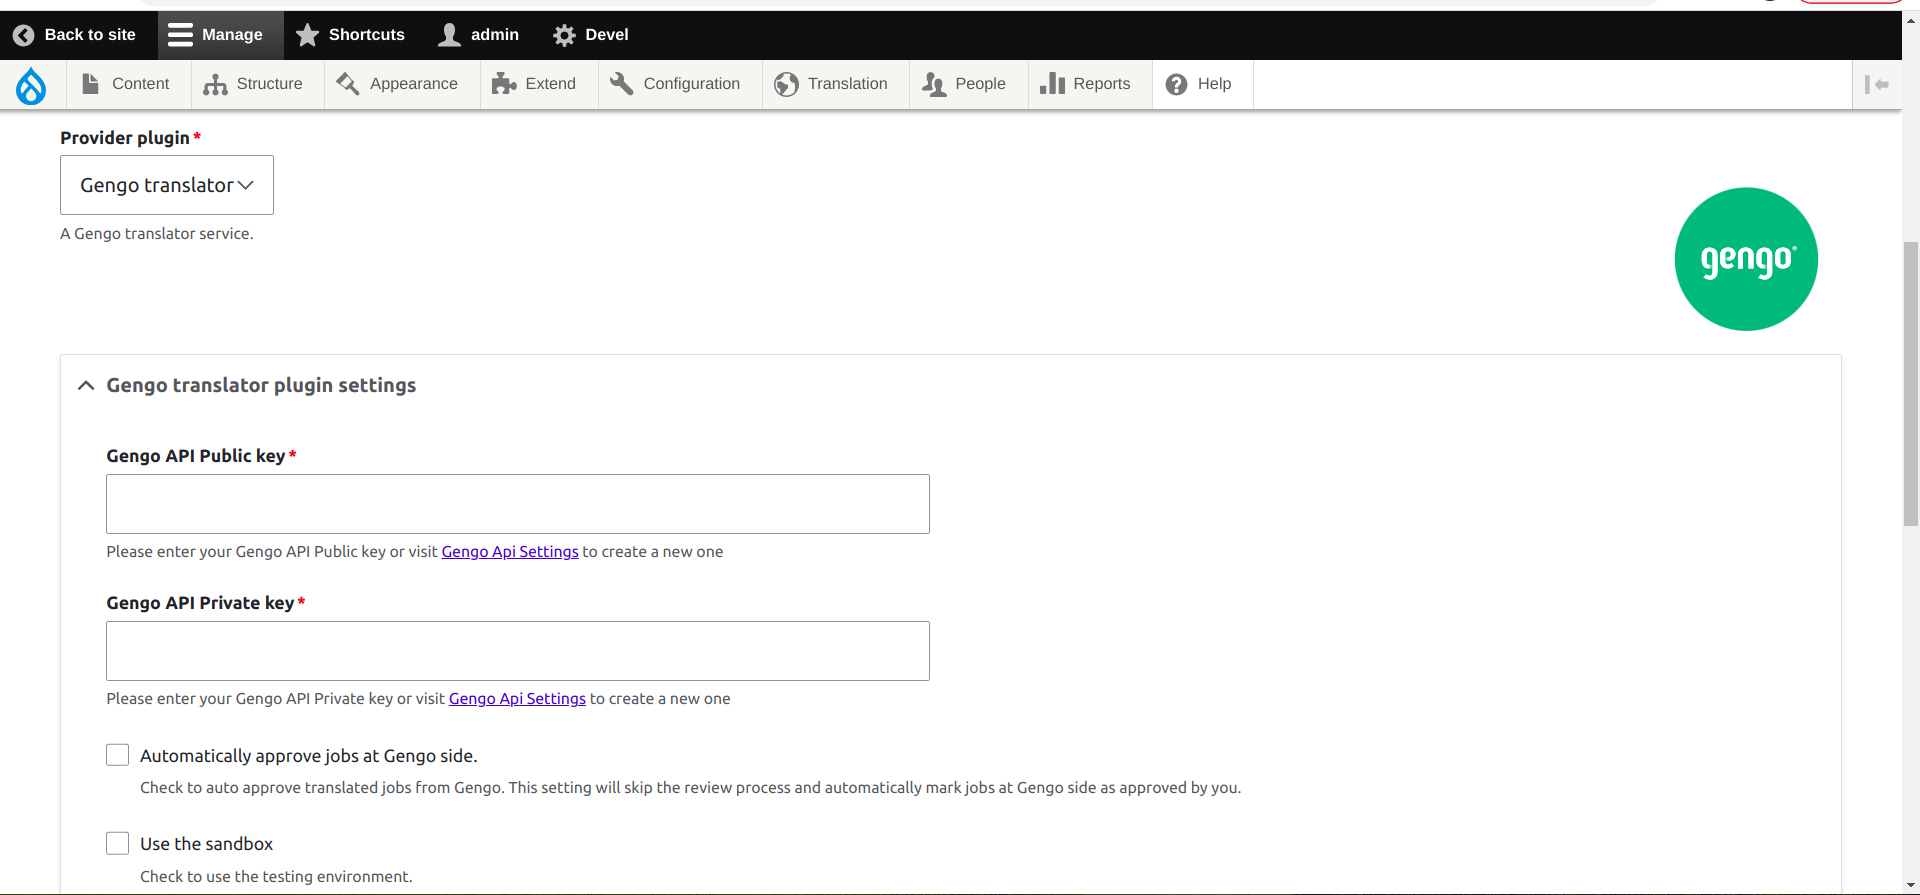
Step 3: Provider Details
Go to gengo page -> https://gengo.com/account/api_settings
Copy the Gengo API Public key and Gengo API Private key and Paste them on the drupal site
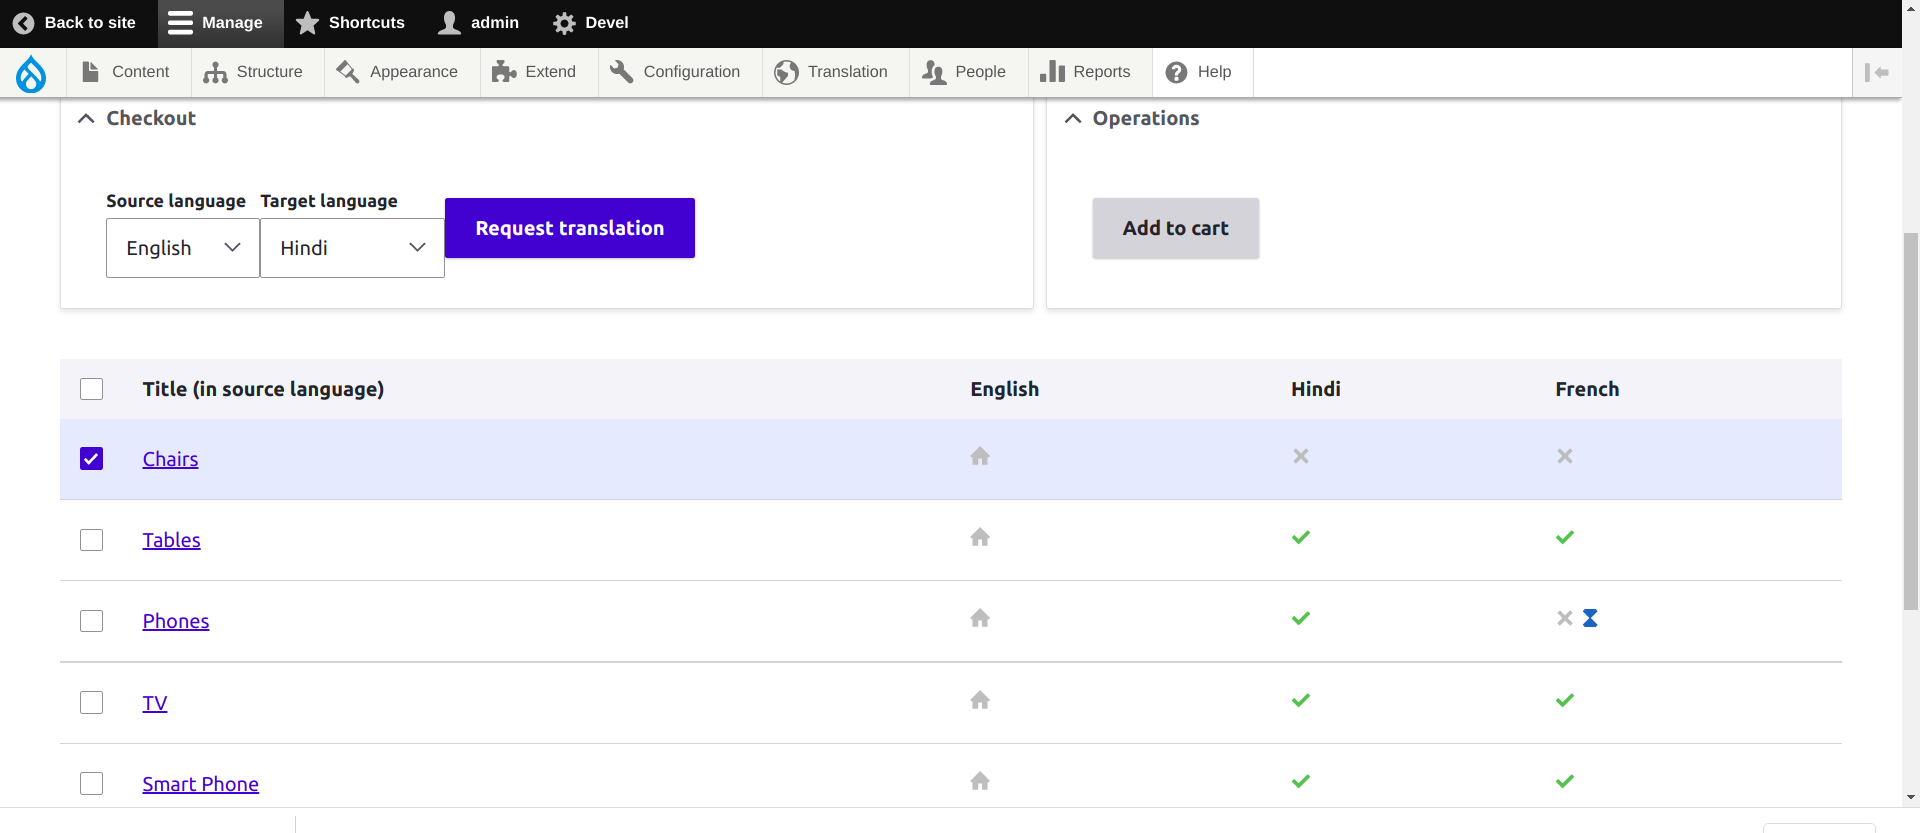
Step 4: Translate Your Items
/admin/translation/sources
Select the Source language and Target language
Select the content which you want to translate and click Request Translation
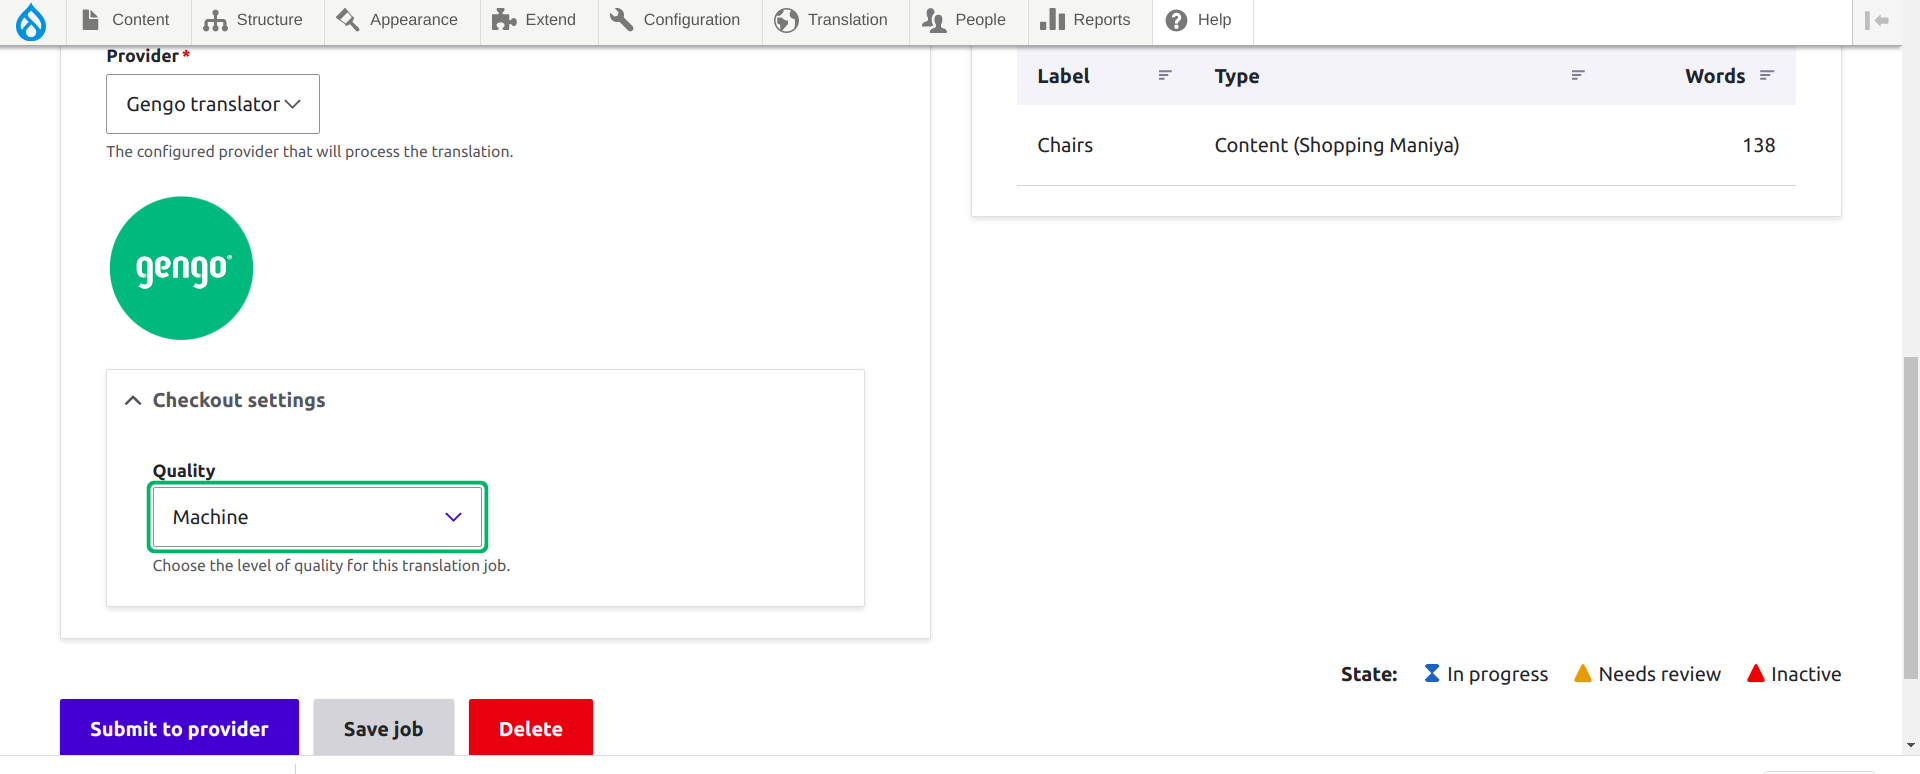
Then, Provider -> Gengo Translator
Quality -> Machine (for free translation choose ‘machine’) click ‘Submit to Provider’
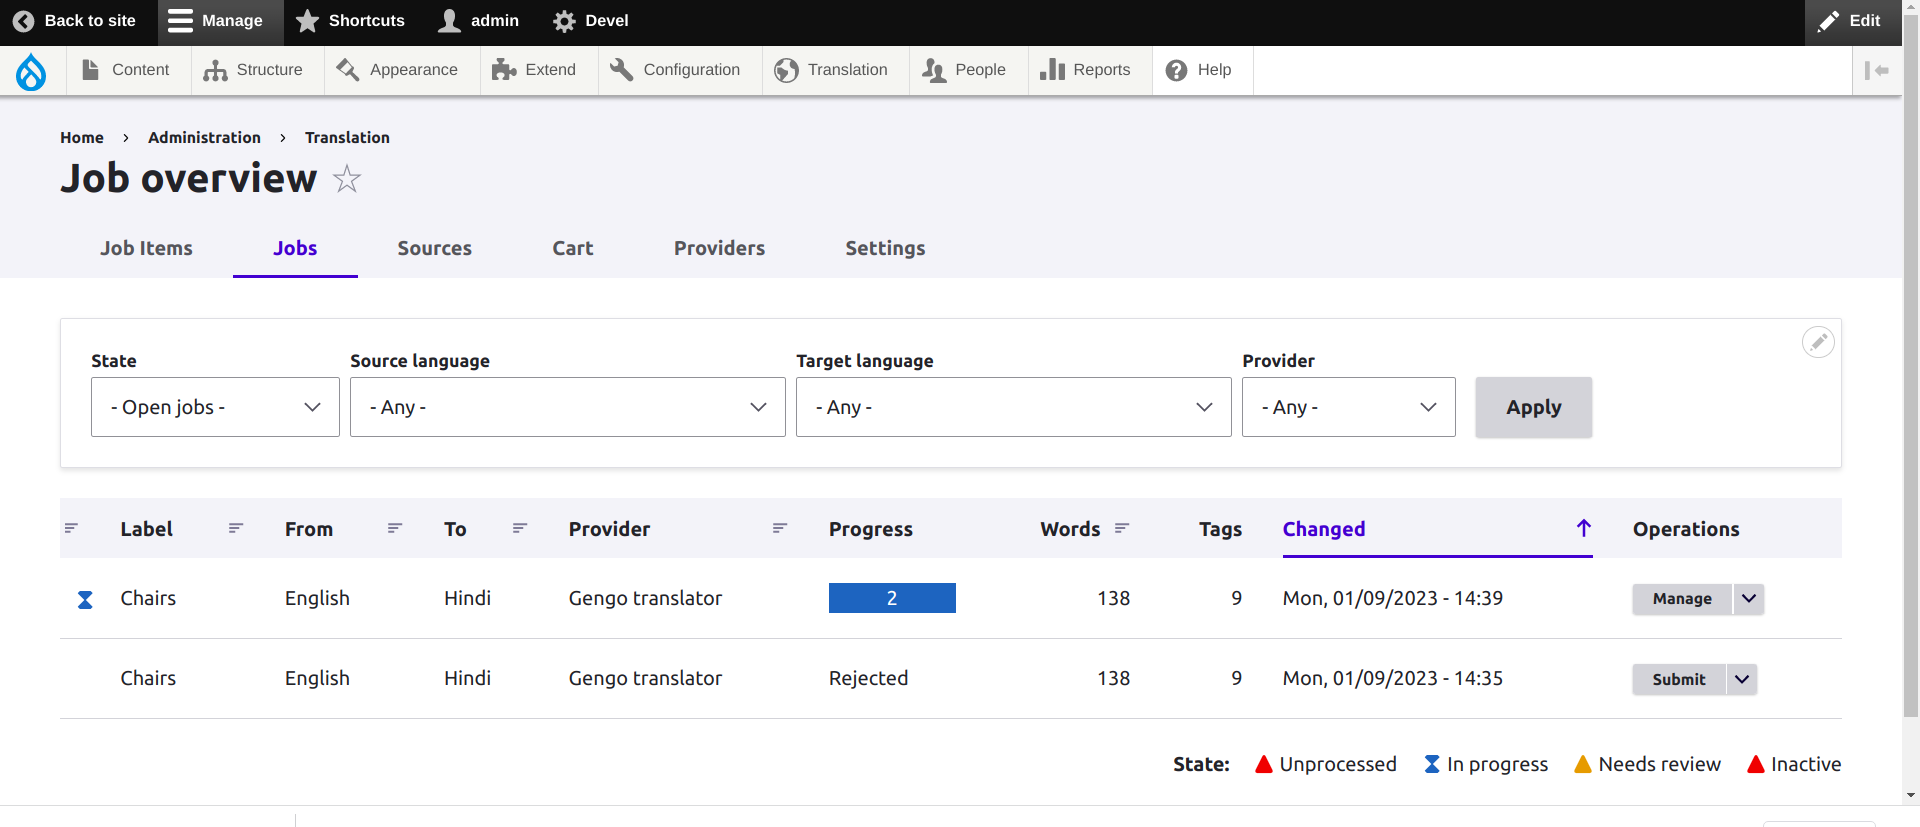
click Jobs/manage/pull translation
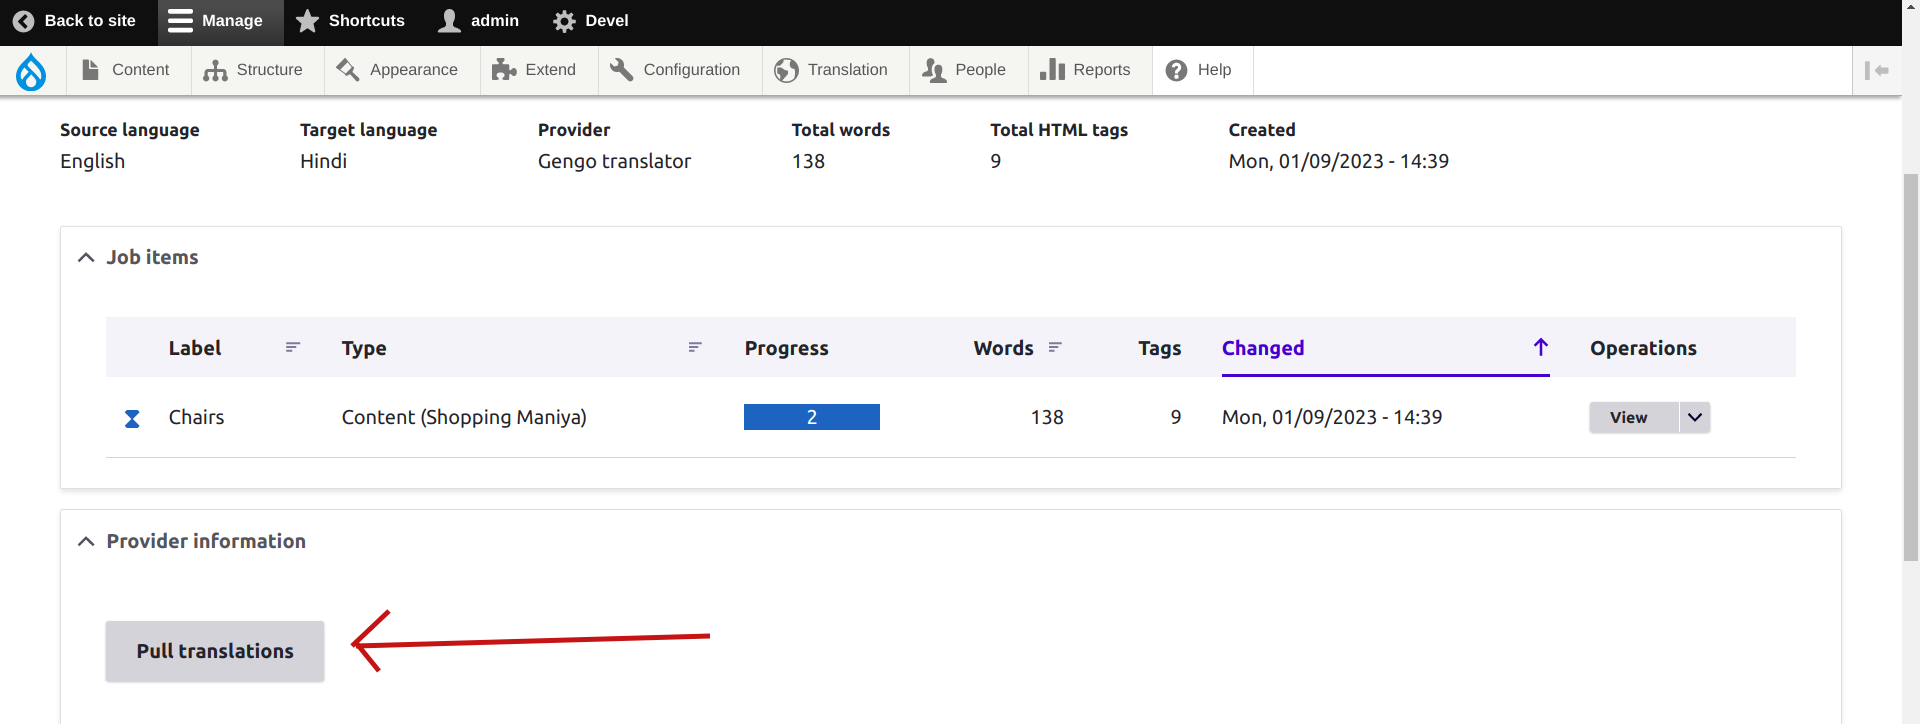
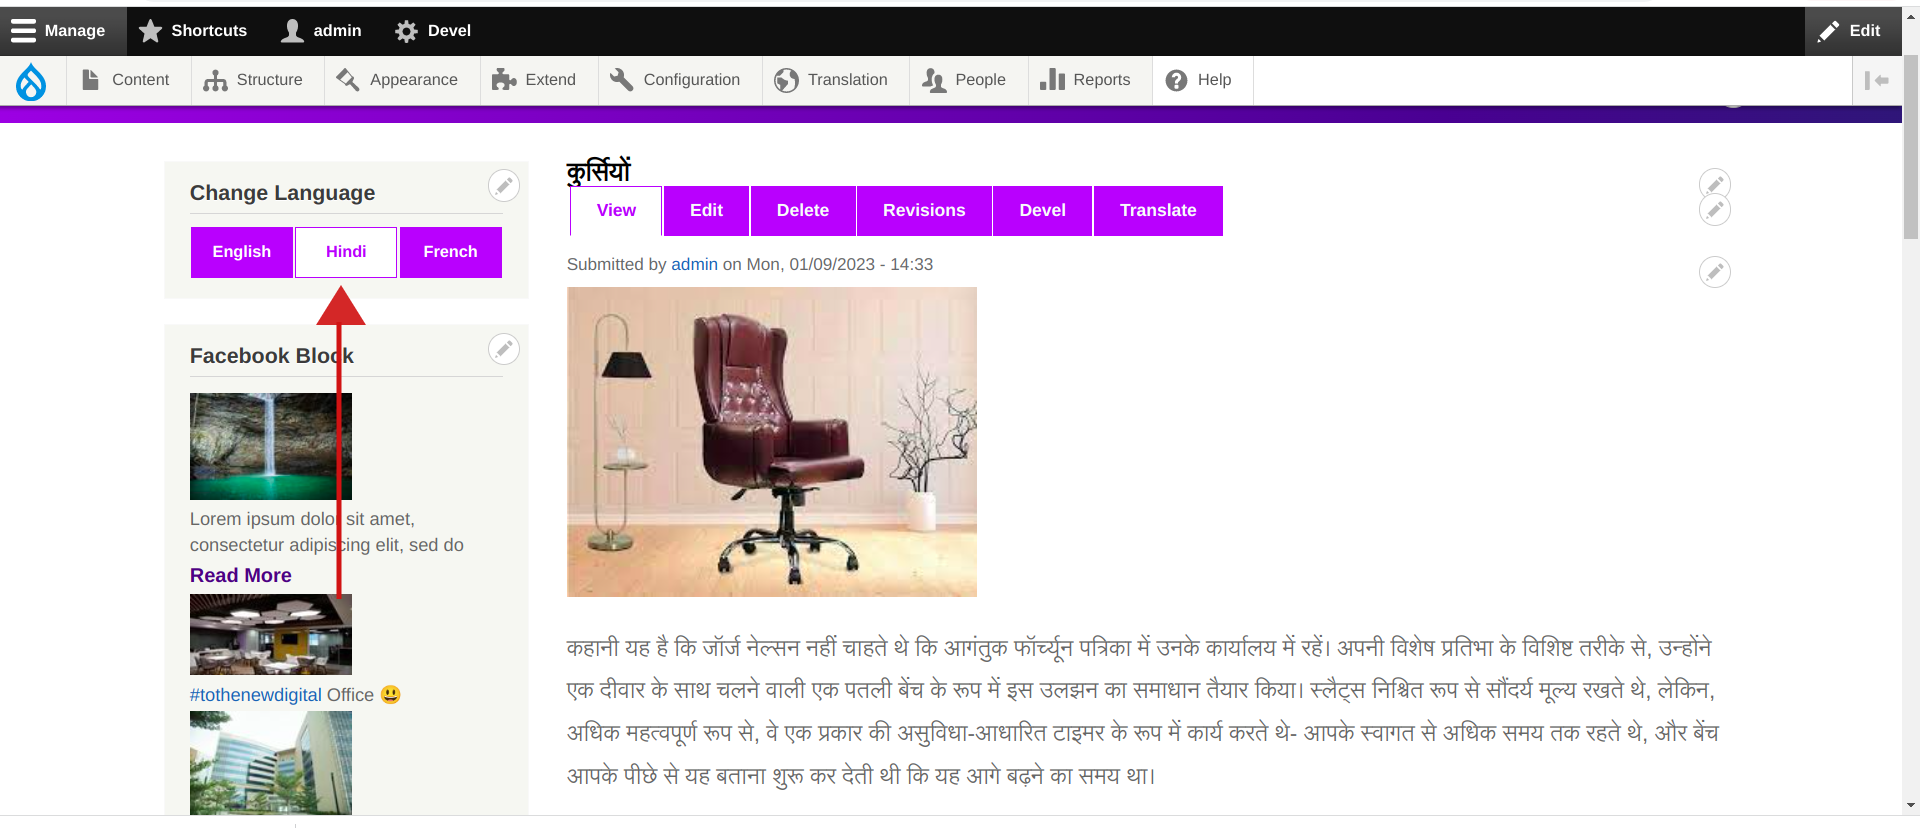
Your Translated Contents are ready.
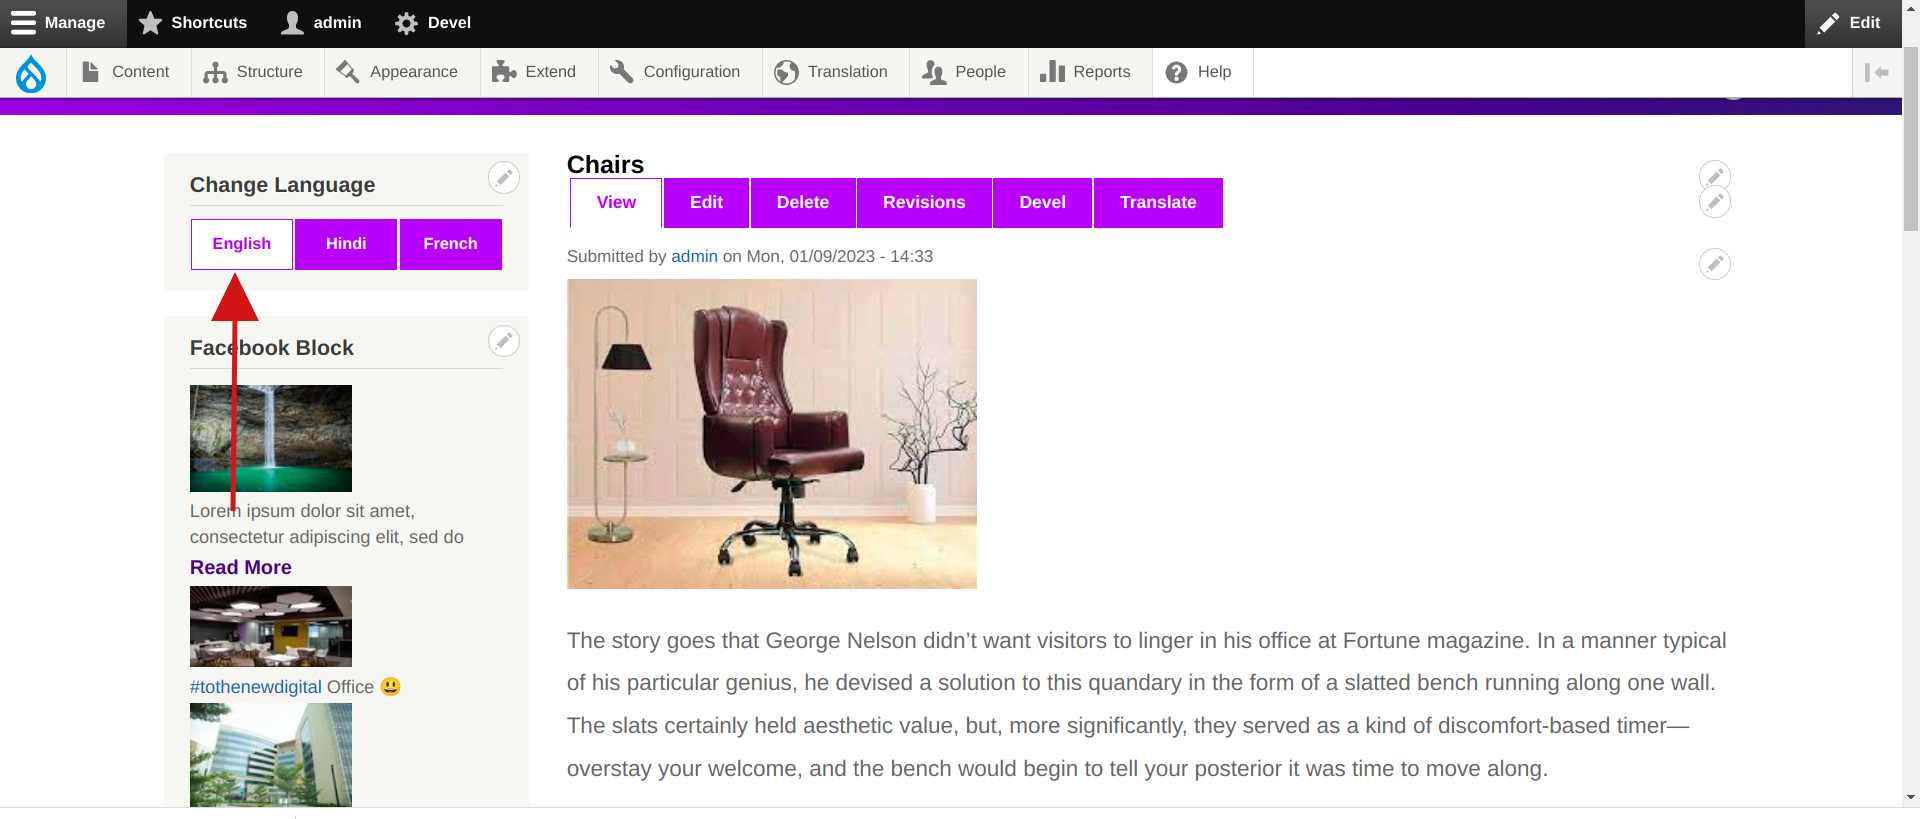
Ex:- You can switch language from English to Hindi then your content will be auto-translated to Hindi
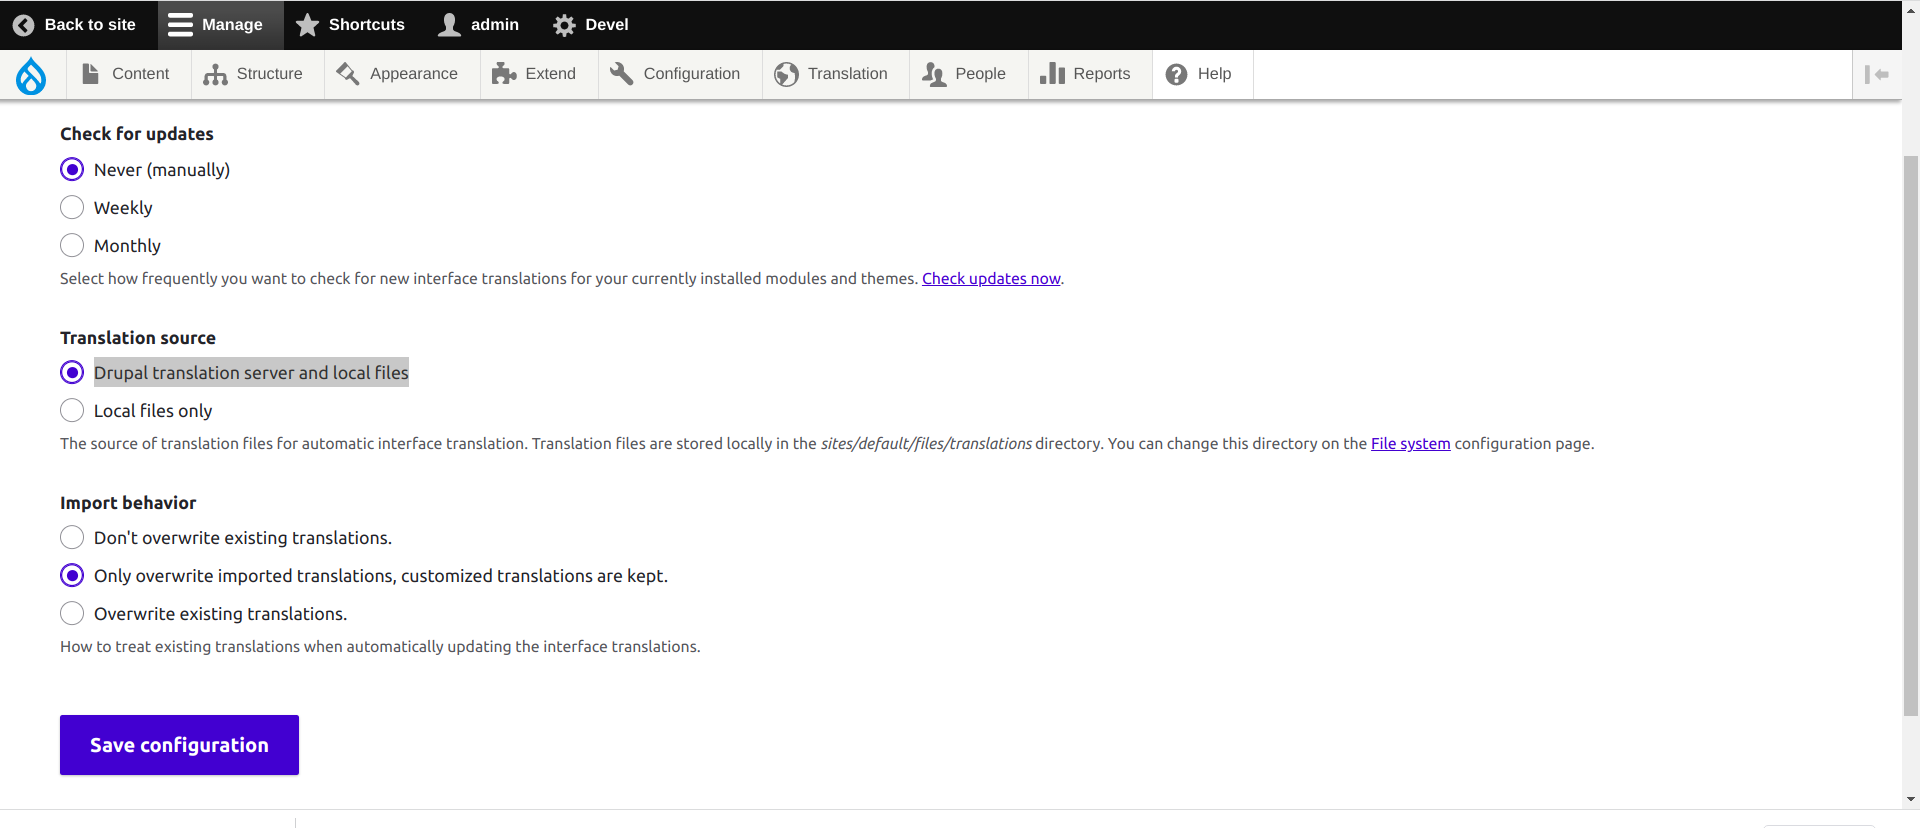
NOTE: “Here we restricted the User Interface Translation”
If you don’t want to restrict User Interface Translation on your site, please go to “Translation source and select ‘Drupal translation server and local files’ and then add Language on your site ” or follow the attached image.
Does Drupal Have Built-In Multilingual Support?
Yes, Drupal does have built-in multilingual support through its core modules such as Language, Content Translation, Configuration Translation, and Interface Translation. These modules allow administrators to manage languages, translate content, and localize the user interface without relying on external tools. However, when paired with auto-translation services, Drupal’s native multilingual capabilities become even more powerful, enabling faster content delivery across regions.
Implementing multilingual and auto-translation functionality in Drupal requires thoughtful planning, module selection, and performance optimization. Many organizations choose to work with experienced teams offering Drupal development services to ensure seamless integration, scalability, and long-term maintainability of multilingual websites.
Thank You.