Are you excited to write your own code in Drupal 8?
But wait a second, Drupal‘s cache may kill all your development hours. This blog is for you, if you are facing any of the following challenges.
- Are you struggling to see your changes on web pages?
- Every time, you change a piece of code, it doesn’t reflect until you clear cache.
- This problem may get worse, if you have more than 1 GB of database.
- You type drush cr and it takes more than 15-30 minute
You must be wondering how to switch off cache in your local development environment?
So, here’s the blog that will provide you a best way to improve productivity while writing code for Drupal 8.
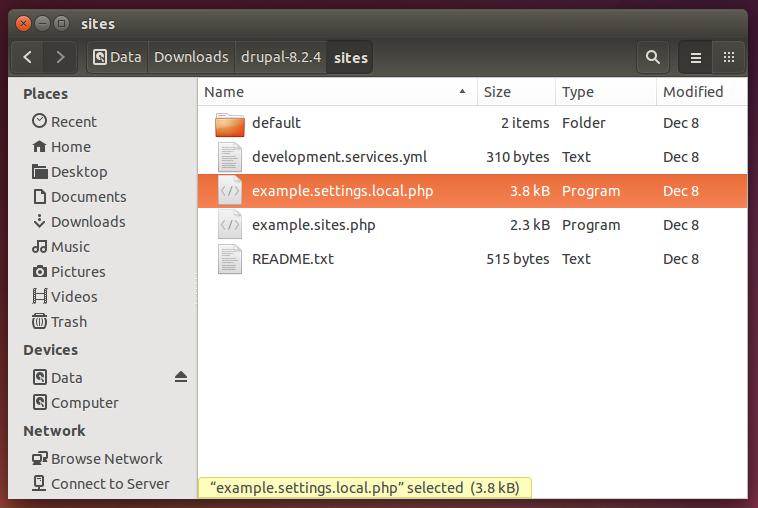
- Drupal 8 comes with example.settings.local.php with in /sites directory.
This file is built for developers and can disable- Caching
- JavaScript/CSS compression
- Re-routing of outgoing emails
- This file should be copied to /sites/default/ directory.
- And this should be renamed into settings.local.php.
Un-comment following 3 lines in your settings.php. You will get this code around end of your settings.php file. For me it was on line # 753.[java]# if (file_exists($app_root . ‘/’ . $site_path . ‘/settings.local.php’)) {
# include $app_root . ‘/’ . $site_path . ‘/settings.local.php’;
# }[/java] - settings.local.php will modify the following in Drupal
- Assertions
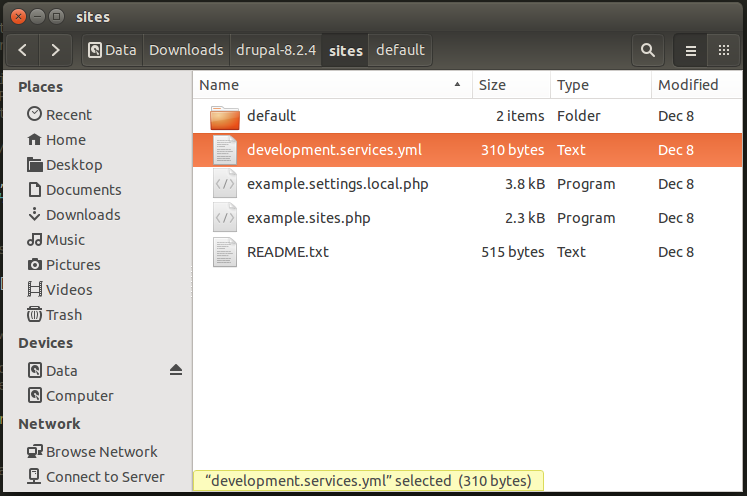
- Enable local development services. This will include /sites/development.services.yml, which makes life easy for developers.
- Show all error messages, with back trace information.
- Disable CSS and JS aggregation.
- To disable the render cache we need to un-comment
[java]$settings[‘cache’][‘bins’][‘render’] = ‘cache.backend.null’;[/java]
In Drupal 8, the rendered data gets cached at multiple levels:
- Page
- Block
- Entity (node, comment, user, etc.)
- View
- Menu tree
- Text Format filter result
- To disable Dynamic Page Cache we need to un-comment
[java]$settings[‘cache’][‘bins’][‘dynamic_page_cache’] = ‘cache.backend.null’;[/java]
- Allow test modules and themes to be installed.
- Enable access to rebuild.php.
- Skip file system permissions hardening.
Now, the Drupal works normally but without any cache running. If you don’t face any performance glitch, then you are done. However, in some cases naked Drupal could be very slow.
To improve the performance the developers can add Memcached.
Memcached
We have disabled all sort of cache in Drupal. Now, we will add one level of caching by implementing Memcached in the local machine.
I was working on Ubuntu 14.04 so in case you are also on a similar operating system, the following steps can help you to implement Memcached in your local environment.
[java]sudo apt-get update
sudo apt-get install php5-memcached memcached
[/java]
The installation usually is a hassle free task. You can check Memcached is running in the phpinfo().
To restart Memcached, run the following code
[java]sudo service memcached restart[/java]
Now, enable Memcache module in Drupal. Once enabled, you need to add the following code to the settings.local.php
$settings['memcache']['servers'] = ['127.0.0.1:11211' => 'default'];

$settings['memcache']['bins'] = ['default' => 'default'];

$settings['memcache']['key_prefix'] = '';

$settings['cache']['default'] = 'cache.backend.memcache';

$settings['cache']['bins']['render'] = 'cache.backend.memcache';
Here, we have overridden render cache configuration once again which was disabled earlier in settings.local.php.
We specified ‘cache.backend.memcache‘ to use Memcached to render cache data.
So, if you follow this process, you will be set to write a clean code for Drupal 8.