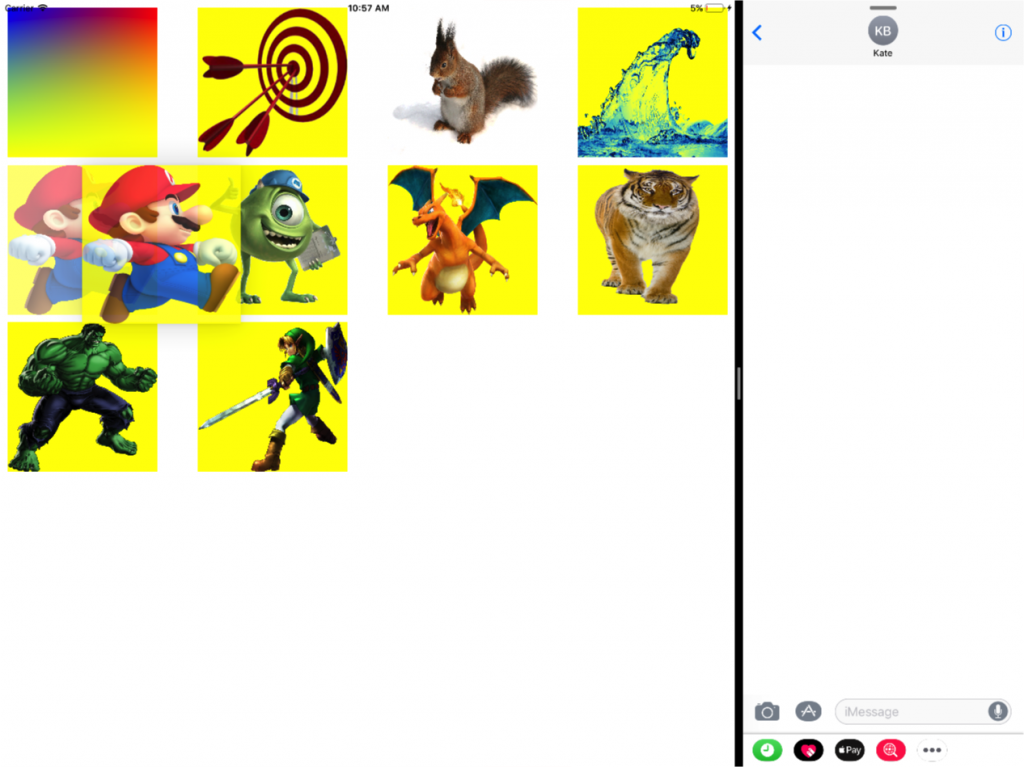
In WWDC 2017 Apple has introduced Drag & Drop Interaction API with iOS 11. This API will help to implement Drag & Drop feature within the same application or between different iOS applications. But for now, this API is enabled only in iPad.
Now we will learn how to implement Drag & Drop feature in UICollectionView. This feature is divided into 2 parts:
- Drag
- Drop
We can implement any of the following features according to the requirement of the application:
- Only Drag
- Only Drop
- Both Drag & Drop
Drag Feature in UICollectionView
To implement Drag in UICollectionView Apple has introduced UICollectionViewDragDelegate. Here are the steps to achieve Drag feature:
- First of all, you need to conform UICollectionViewDragDelegate to your collection view.
- Conform NSItemProvider to object that you want to drag
- Now implement required method of UIcollectionViewDragDelegate :
[code language=”objc”]
// provide items to begin a drag associated with a given indexPath.
func collectionView(_ collectionView: UICollectionView, itemsForBeginning session: UIDragSession, at indexPath: IndexPath) -> [UIDragItem] {
// access the selected obect from your data
// in my case imagesArray is array of UIImages
let photo = imagesArray[indexPath.item]
// since UIImage already conforms to NSItemProvider writing, we can just use it
// to create an NSItemProvider. For your own model object, if you’re dragging
// something other than images, you’ll have to make sure that those objects
// conform to NSItemProvider writing.
let itemProvider = NSItemProvider(object: photo)
// now create drag item from NSItemProvider
let dragItem = UIDragItem(itemProvider: itemProvider)
return [dragItem]
}
[/code]
This completes the basic implementation of Drag feature, but if you want to extend the functionality like Drag multiple items, then you can implement other optional methods of UIcollectionViewDragDelegate.
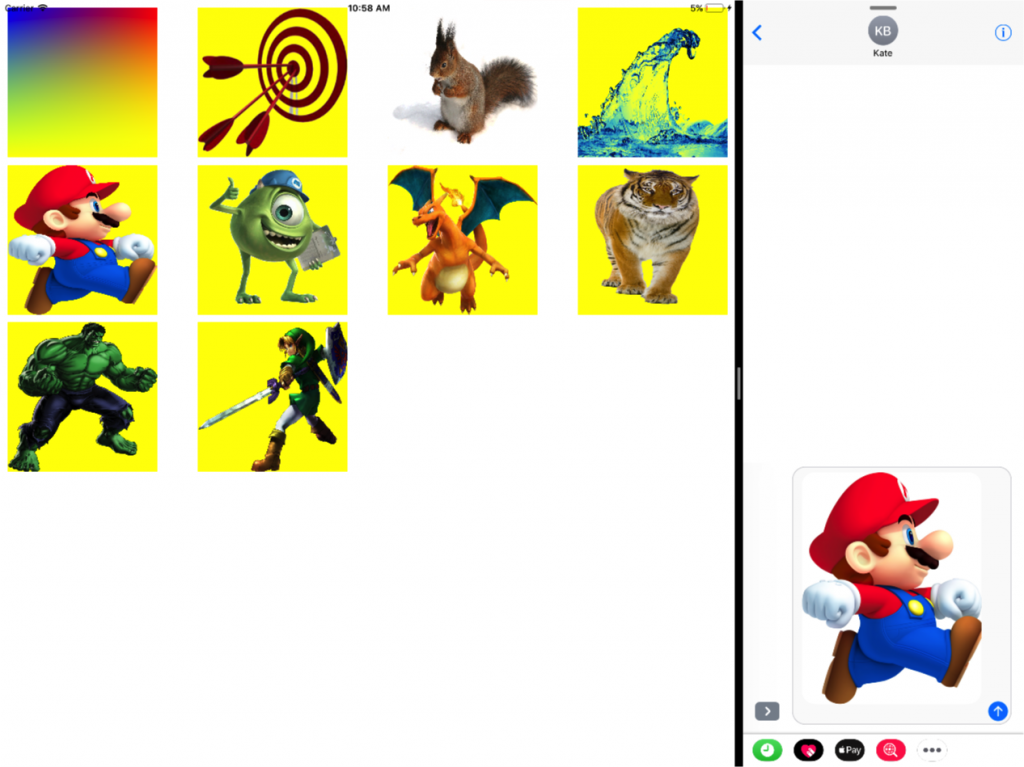
Drop Feature in UICollectionView
To implement Drag in UICollectionView Apple has introduced UICollectionViewDropDelegate. Here are the steps to achieve Drop feature:
- First of all, you need to conform UICollectionViewDropDelegate to your collection view.
- Now implement required method of UICollectionViewDropDelegate:
[code language=”objc”]
// Called when the user initiates the drop
func collectionView(_ collectionView: UICollectionView, performDropWith coordinator: UICollectionViewDropCoordinator) {
// destinationIndexPath is the indexpath where u want to drop object, set it
// to initial position if it is nil
let destinationIndexPath = coordinator.destinationIndexPath ?? IndexPath(item: 0, section: 0)
// use the dropCoordinator to specify how you wish to animate the dropSession’s
// items into their final position as well as update the collection view’s data
// source with data retrieved from the dropped items.
coordinator.session.loadObjects(ofClass: (UIImage.self), completion: { (images) in
for photo in images {
self.imagesArray.insert(photo as! UIImage, at: destinationIndexPath.item)
collectionView.performBatchUpdates({
collectionView.insertItems(at: [destinationIndexPath])
})
}
})
}
[/code]
This completes the basic implementation of Drop feature between different apps, but if you want to extend the functionality like smooth drop transition Animations, move the item within collection view, then you can implement other optional methods of UIcollectionViewDropDelegate.
Wow! You have learned the basic implementation of Drag & Drop in UICollectionView.