I have always loved using Docker the traditional way. Running commands like docker run etc. has been the way we use Docker. While surfing the internet, I found this chrome app which can be downloaded and installed via google chrome and easily be used for getting a user-interface for your Docker Engine. It simplifies the way we use Docker. Now, we can use Docker by clicks rather than commands. “Docker Simplified”
Use-Case
Simply finding a Docker User Interface tool which is easy to use. I found this on google:

You can find it here: Link
It is a web interface that allows you to interact with the Docker Remote API. It’s written in JAVA Script using the AngularJS framework. So, Let’s see how to install it for Docker running on your local machine. You can follow these steps for any remote server too.
Installation Steps
1. Go to the link I have shared above in the Chrome browser. Then click on ADD TO CHROME:
 You can find it here as well after adding to chrome that is by typing the following in your chrome address bar: chrome://apps/
2. Next, you need to make some changes
You need to enable Docker Remote API and for that you need to edit /etc/default/docker to allow connections adding (do this where your Docker Engine resides, can be your local machine or a remote server):
[js]DOCKER_OPTS=’-H tcp://localhost:2375 -H unix:///var/run/docker.sock'[/js]
Note: For secure usage, if you are accessing the Docker Engine present on the local machine then use localhost in the above line else use ISP’s IP when the Docker Engine in on a remote machine.
Restart the Docker service using:
[js]sudo service docker restart[/js]
Open your browser and verify you can connect to http://localhost:2375/_ping (there is an _ before ping in the URL)
For connecting to a remote server in the above URL just replace localhost with the server’s IP. You should get an OK message. Remember, you need to allow the server to listen at port 2375 to your IP(allow the IP in firewalls or security groups).
On the server if you enter the command:
service docker status
It should show the following:

3. Once the above is done, click on LAUNCH APP:
Using Simple Docker UI
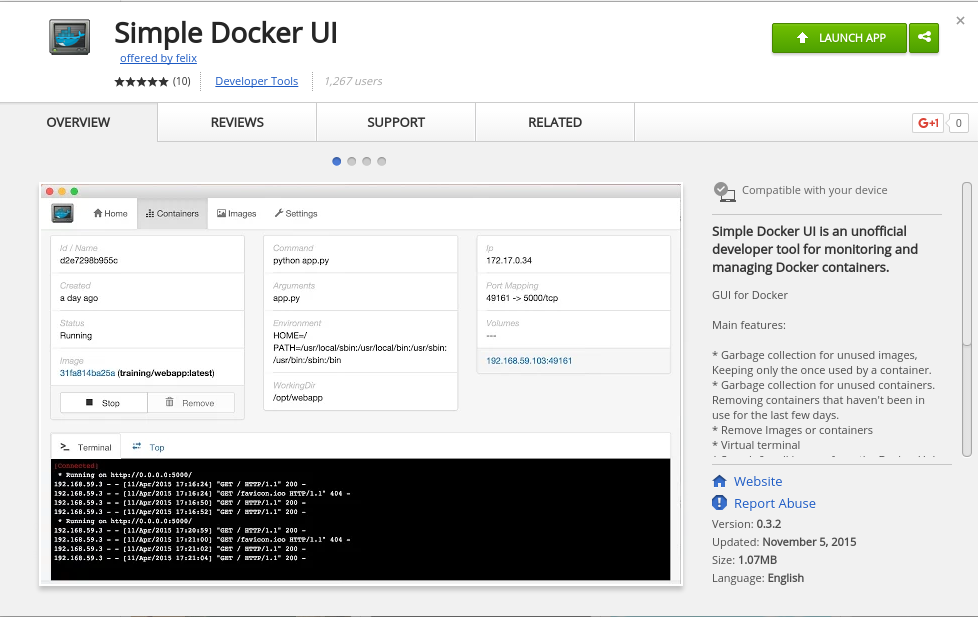
When you click on LAUNCH APP it will open something like:
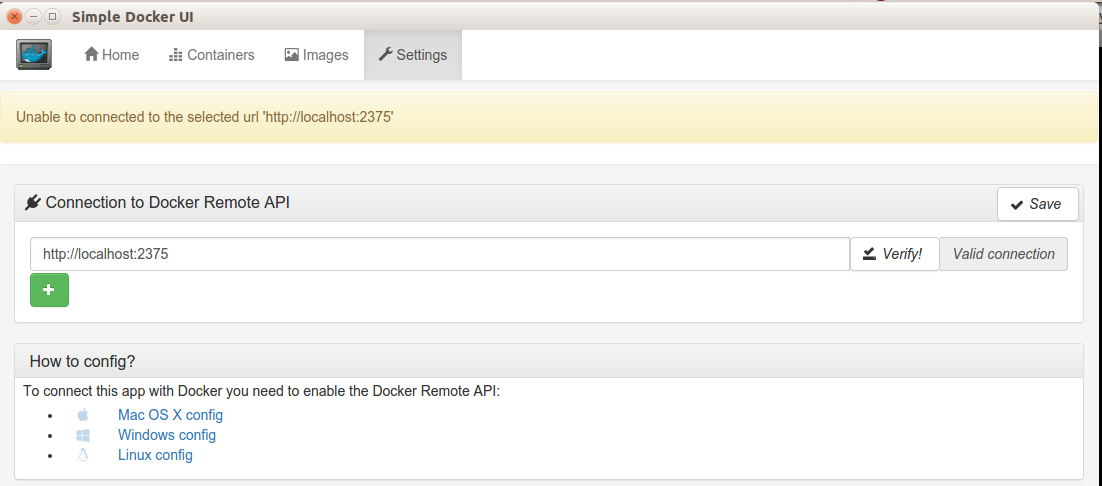
Make sure the changes you made to the default file I mentioned in installation step 2 are saved, Docker service has been restarted and the service is running. After this, click on “Verify”. It should say “Valid connection”. If it says that the connection of the Docker UI has been made to your local machine’s Docker Engine. Now, just click on save.
Note: Replace localhost by server IP for a remote server.
Let’s head to the home tab. Just click on “Home” on the top left corner. It will show display few things as in the below image:
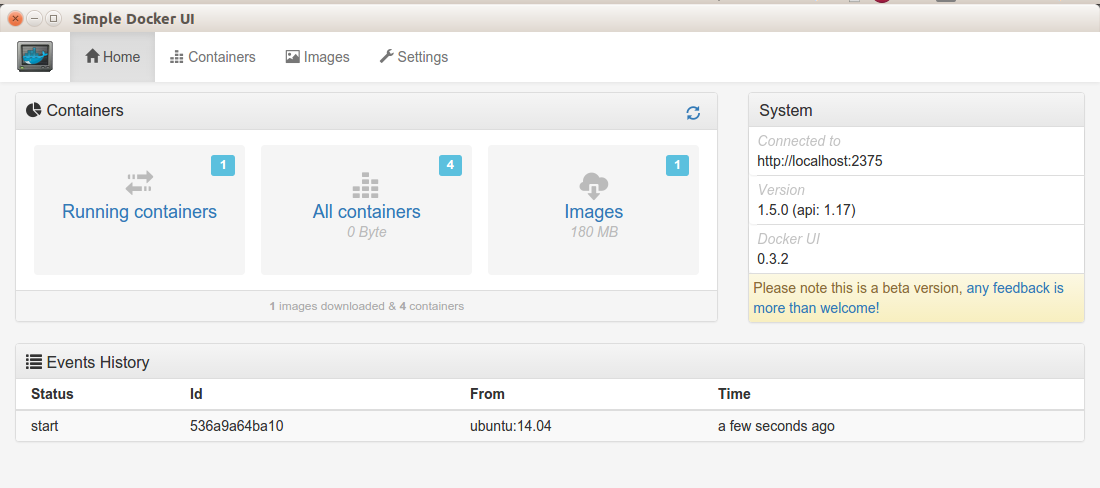
This is an overview of Docker on your local machine. It has the connections showing on the right side along with Docker and Docker UI version. In the center, it has an overview of running containers, All containers, and Images. Also, it has Event History in the bottom.
Now, you can see all the containers clicking on either of the two container options showing (Running containers/All containers) and it will take you the “Containers” tab adjacent to the “Home” tab. So, you can also go there by clicking on the “Containers” menu. Same is the case for “Images”.
Lets, see what “Containers” menu has for us:

So, it has all the containers listed, segregated into running and stopped/exited. Let’s see what we can do here. Click on the running container’s container ID:

It will open options as shown below:
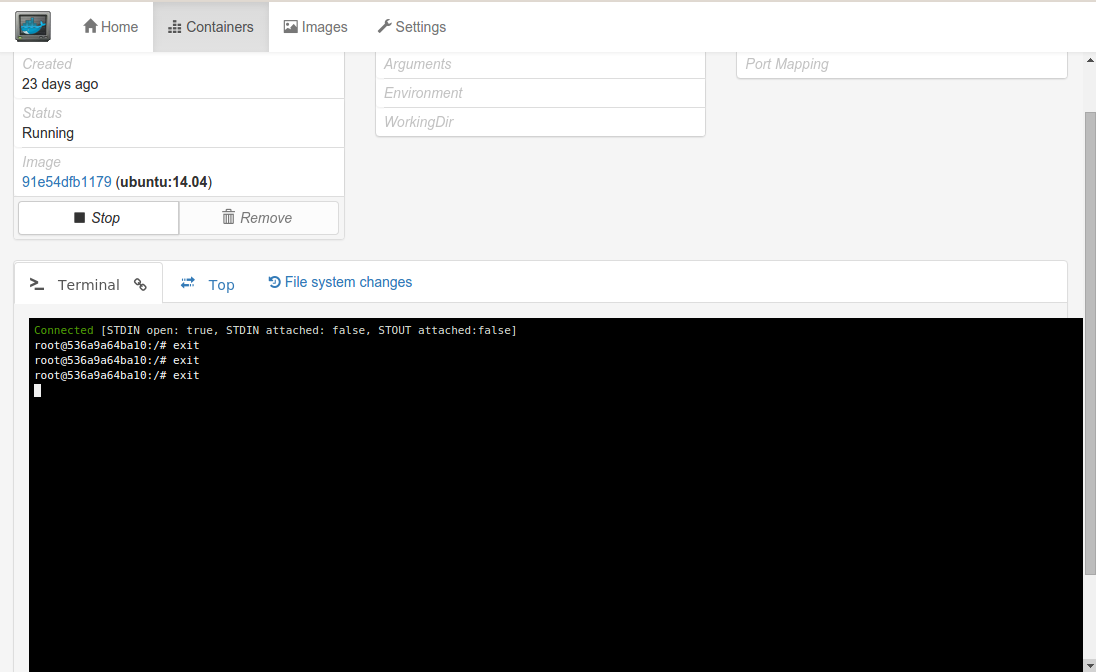
It gives you options like Stop and Remove. (You would need to stop the container before removing/deleting) it. Next, the main thing here it the TTY for the container. You are inside the container and you can enter any command you want to execute inside the container:
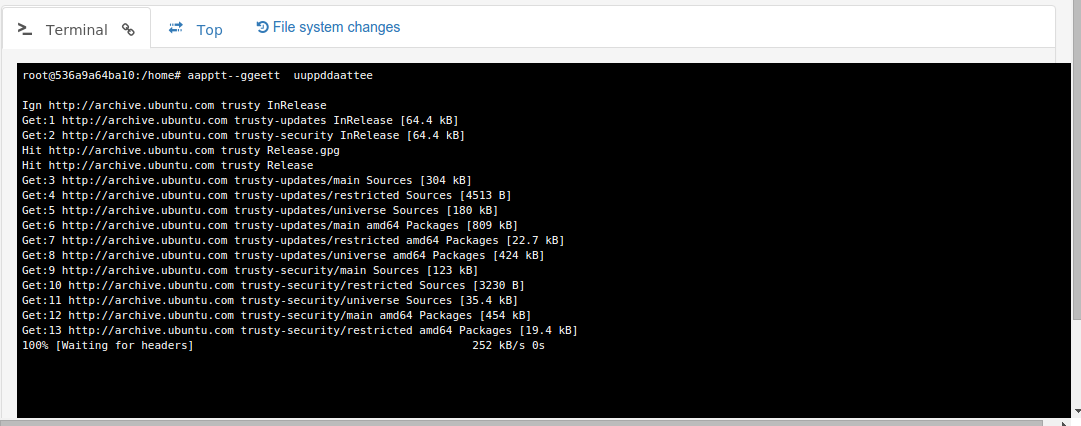
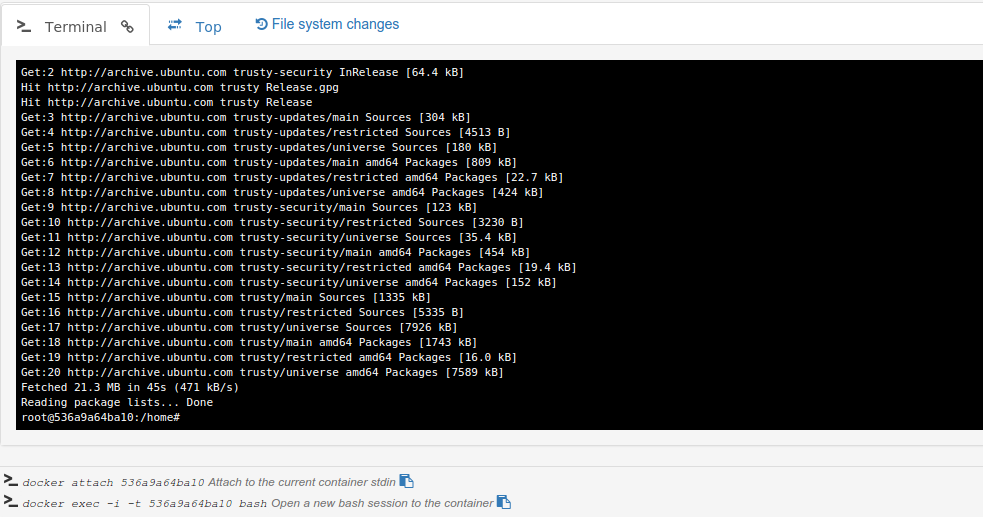
Since the tool is still in Beta stage, sometimes when you type a command for eg. apt-get update it may show it on the screen like aapptt–ggeett uuppddaattee, but don’t worry it executes properly with no flaws:
Next option available is Top which shows the top processes running inside the container. Since, it is base Ubuntu image that I used to run this container it shows the following:

Now, is the File system changes option which shows the following which is self-explanatory:

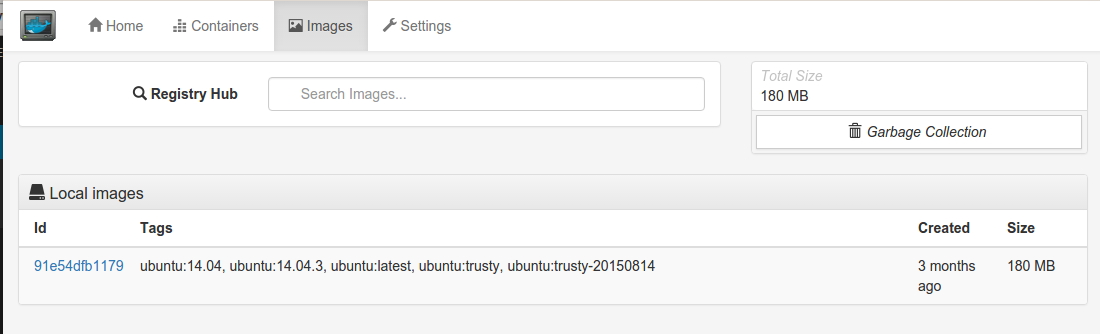
Let’s see what the Images menu has for us. It will show all the Docker images present on my local machine and allow me to launch new containers too:
Click on the Image ID and something like below will pop out:
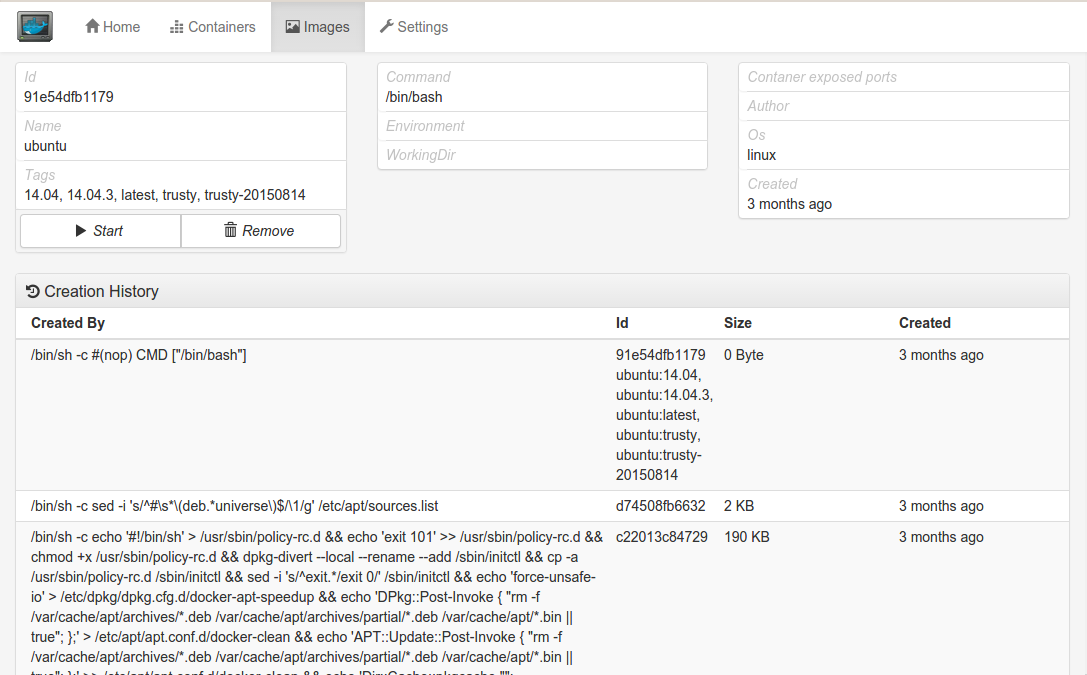
It will show you options like Start and Remove. It will also show the CMD, ENV and WorkingDir. Here they are empty as this is a base Ubuntu image. Along with all that on the right-hand side it shows Container exposed ports, Author, OS and creation date. At last, in the bottom it shows the creation history of the Docker image.
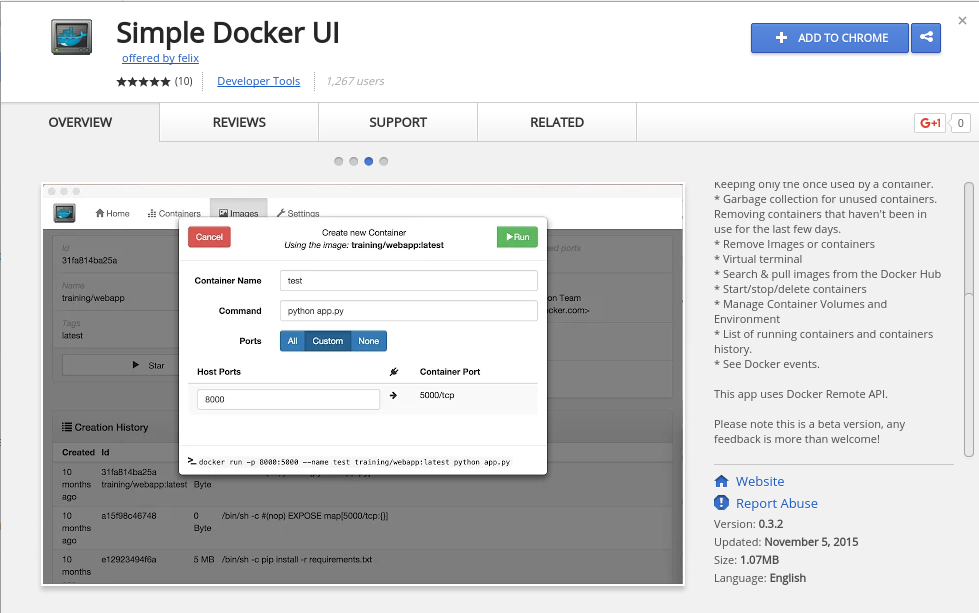
Let’s roll up a Docker container now. Just click on Start:
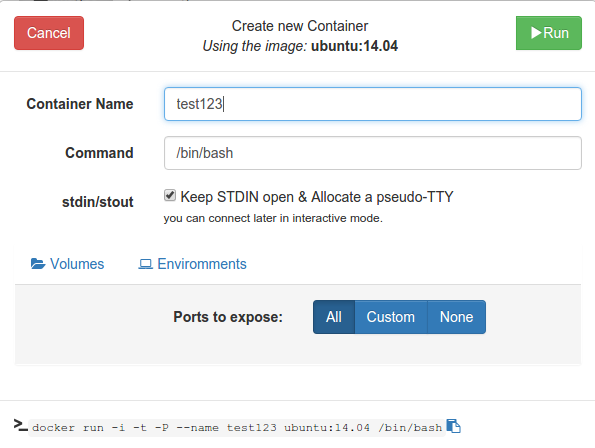
So, there are basic options like:
Container Name, Command(CMD), stdin/stdout (-i and -t switch) and Ports to expose (All, Custom and None). Select these options and then there are two more important options that it gives: Volumes and Environments. We can go through these options one by one:
Volumes:
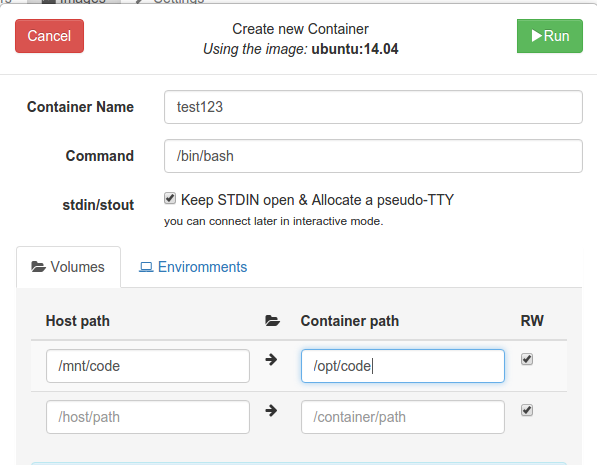
It will make the /mnt/code directory available inside the container at /opt/code. If the /opt/code directory does not exist Docker will create one.
Now, you can also input environment variables by clicking on the Environments option:
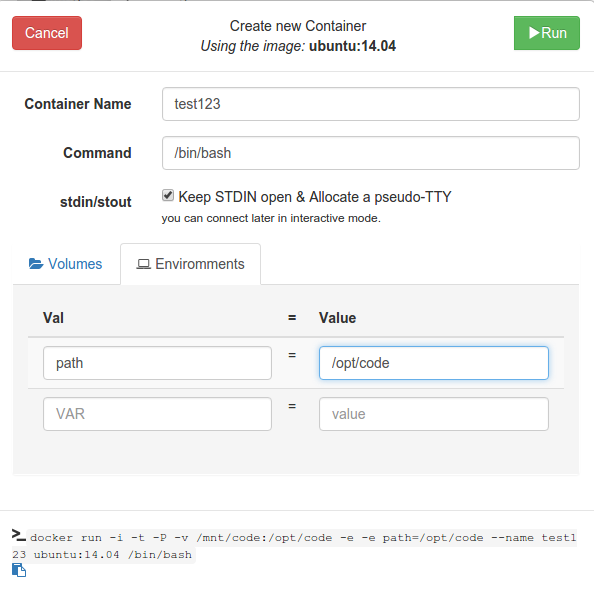
I have used a random variable for example. After this just click on run.
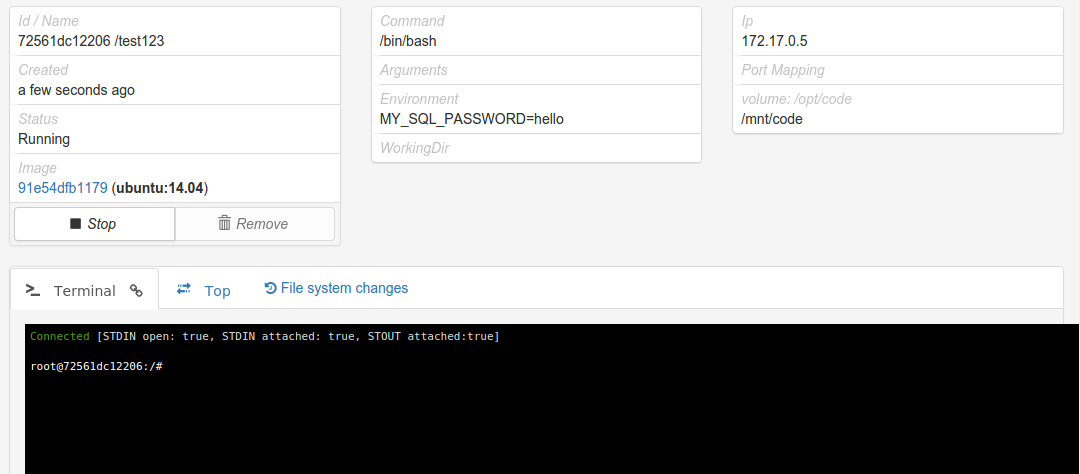
The container is up and running. So, that is how easy it is to use Docker with Simple Docker UI. Anyone having even little knowledge about Docker can use this app and make full use of Docker with a couple of clicks. Hopefully, more features will be added to the app very soon and I will be back with another blog on the same.