
Wildfly, previously known as JBoss AS, is a fully implemented JEE container – application server, authored by JBoss Incorporated. In 2006, JBoss Inc was acquired by Red Hat and since then Wildfly became their product.
Wildfly is production ready, cross-platform and open-source application server with paid support subscription from Red Hat. The latest version being 10, let’s have a glimpse of its bells and whistles.
What’s unique about Wildfly
With many Java application servers like Tomcat, Jetty, WebSphere available, why would one use Wildfly? Good that you asked, here’s why:
- Management Console
One of my favorite features about Wildfly is its comprehensive console which an administrator can deploy, configure and monitor using a web browser. Through users and groups, administrators can also restrict access to desired functionality in the console to certain users.
- Incredible Web Performance and Scalability
With the new web server, Undertow and its ability to work in clusters, Wildfly is the one of the best-in-class, paid or otherwise.
- Modular Approach – Customizable Runtime
Developers of Wildfly have always maintained modular approach in designing it which not only benefits developers who use it, but also the administrators who manage it. You can very easily plug in and out various modules from the application server and make it light or efficient on memory and CPU consumption with just few clicks. Yes, Wildfly comes with a user-friendly management console.
- Unified Configuration
Most of the configurations you will do to a Wildfly installation would be done through a couple of files. No more tackling various configuration files to manage different modules.
- Operational Modes
Wildfly offers two mode of operations: Standalone and Domain mode- Standalone mode is the traditional single node application server with a single JVM and its management console.
- Domain mode is a multi-JVM application server nodes, in which all the nodes share the deployed artifacts and configurations. All the application server nodes are managed by a central point of management, called domain controller. Even the domain mode consumes minimal resources.
- Concurrent and Fast Classloading
Dependency resolution algorithm in Wildly has been improved over time and its complexity is brought down to O. Multiple versions of a jar do not slow down classloading. For even faster results, classes are loaded concurrently.
- Out-of-the-box Modules
Wildfly enables developers with several modules in the form of out-of-the-box APIs, which relieves them and the administrators from the hassle of integrating the modules manually. Some of the modules are as follows:- Infinispan for Distributed Caching
- Hibernate and JPA Integration
- Java Messaging Service Integration
- Java Naming and Directory Interface
- Java Transaction API
- Commonly Used Data Layer’s JDBC Integration
Whoa, That was too much information! Let’s get our hands dirty and see how easy it is to install and configure Wildfly as a Daemon.
Installation, Running and Daemon Configuration
As most of the open source, cross-platform software packages are installed, Wildfly is also one of “unzip and go” types.
We will be using Ubuntu 16.04 for this demo and for the sake of simplicity, we will be using Standalone mode. For Domain mode, configuration, stay tuned to our next blog.
- Install JDK 8

- Download the zip from the Wildfly official download page

- Unzip the downloaded file and extract it to /opt/wildfly

- Open the main configuration file of standalone mode and make the following changes. These changes will make the Wildfly run on the network interface which has the private IP. replace 192.168.33.6 with your with your private IP address.


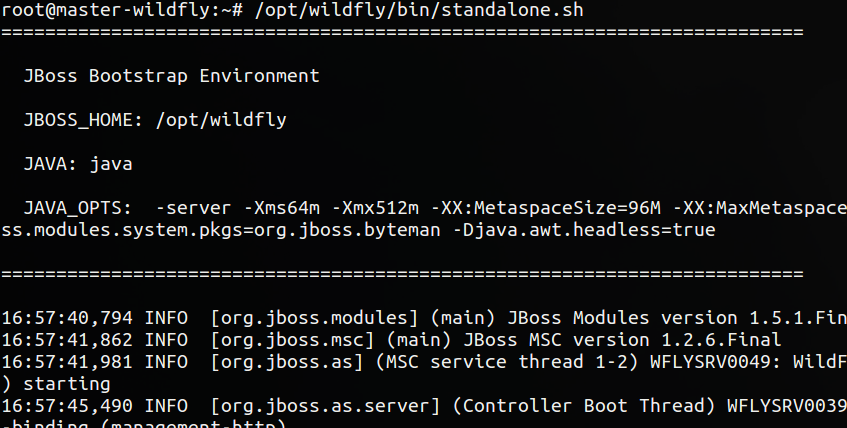
- Run the server.
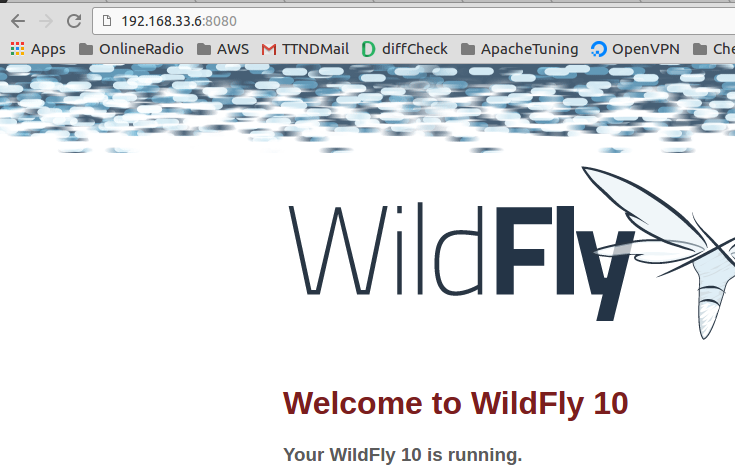
- Check the installation on a web browser.
Now Wildfly is installed and is running through a script. Let’s just quickly daemonize it for easier access.
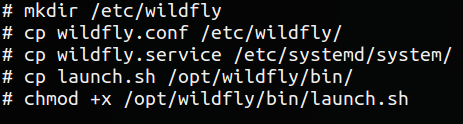
- Quit the already running process by Ctrl+c and go to /opt/wildfly/docs/contrib/scripts/systemd
- Execute the following commands which are already mentioned in the README file
- Open /etc/wildfly/wildfly.conf and make the following change

- Open the /etc/systemd/system/wildfly.service and make the following changes. We are doing so to run the daemon as root user. This is being done for the simplicity

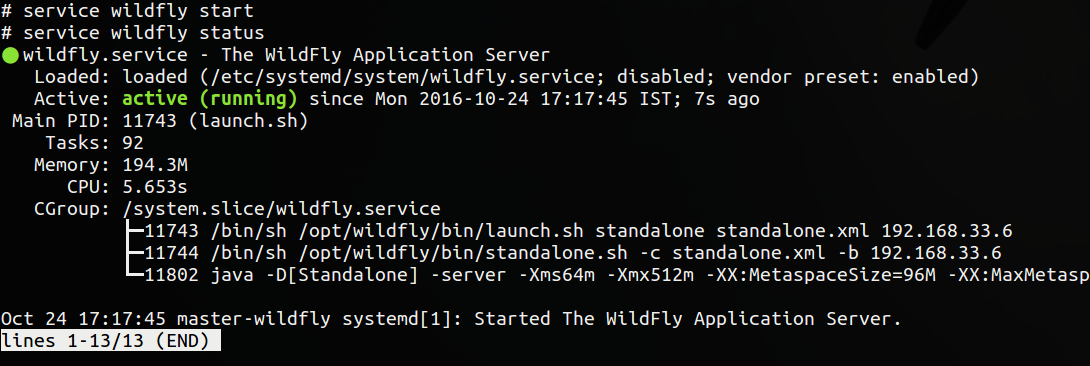
- Start and check the service. Your output may differ from the one mentioned below, it could be due to operating system and its version
Deployment
In this section, we will be deploying a simple web application (war file) on Wildfly.
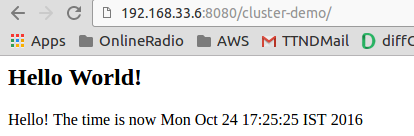
You can use the cluster-demo app for this tutorial, don’t be bothered by its name, it works on Standalone mode just as fine as it would on Domain mode.
As you would have already guessed it, this part would be a cakewalk even for beginners, you just have to copy your war file into /opt/wildfly/standalone/deployments/ directory and voila, you are done.
Check your deployment in your browser by going to address – http://host:8080/application-context
Should you face any issue in deployment, you can check the logs in /opt/wildfly/standalone/log/server.log