What Is a Landing Page?
In digital marketing, a landing page is a standalone web page created specifically for a marketing or advertising campaign. It’s where a visitor “lands” after they click on a link in an email, or ads from Google, Bing, YouTube, Facebook, Instagram, Twitter, or similar places on the web.
What is the Unbounce Landing page:
Unbounce is an AI-powered landing page builder with smart features that let you create beautiful, high-performing marketing campaigns in just a few minutes. Unbounce landing pages help you convert more traffic, more often, with all the customization you need. Use our drag-and-drop builder to create pages in Unbounce.
Creating an Unbounce Landing Page:
- Log in to the Unbounce Conversion Intelligence Platform.
- Click the Create New button at the top right corner.
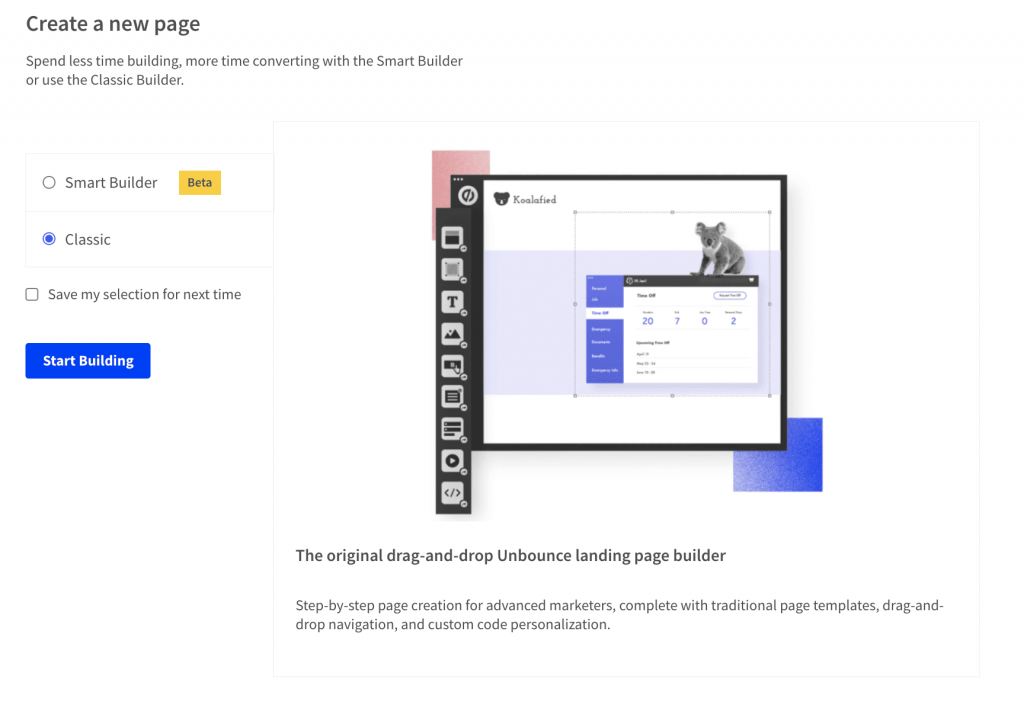
- Choose the option to create a page with the Classic Builder:
- Click Start Building. A page will appear with different templates to choose from:
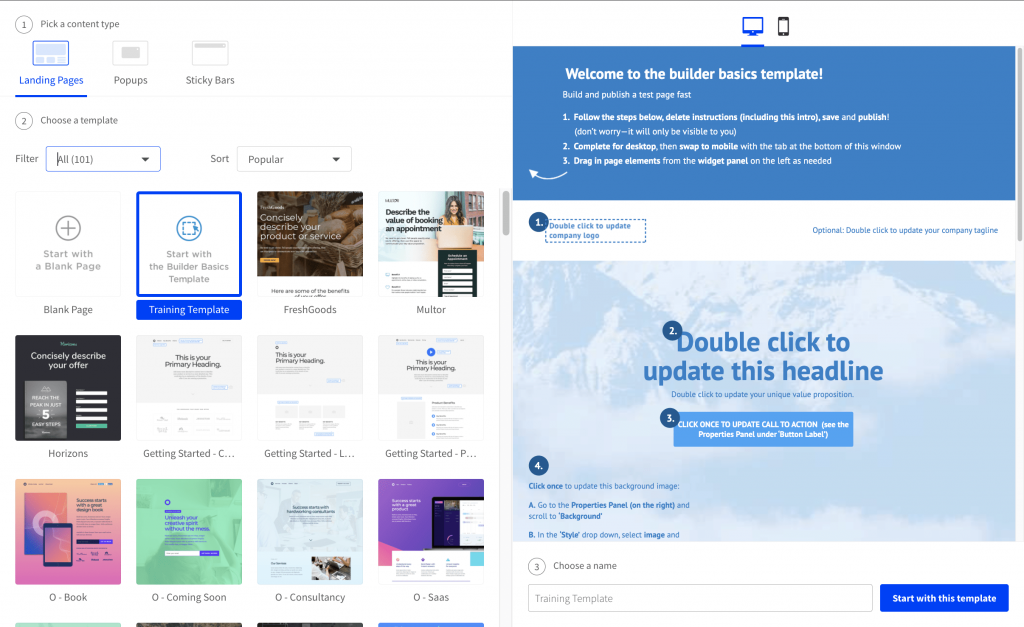
- Under Pick a Content-Type, landing pages should be selected by default.
- Choose a Template from the assortment of pre-made landing page templates.
- You can use the Filter drop-down menu to pick a template to suit the specific purposes of your campaign.
- You can also preview templates by clicking on them:
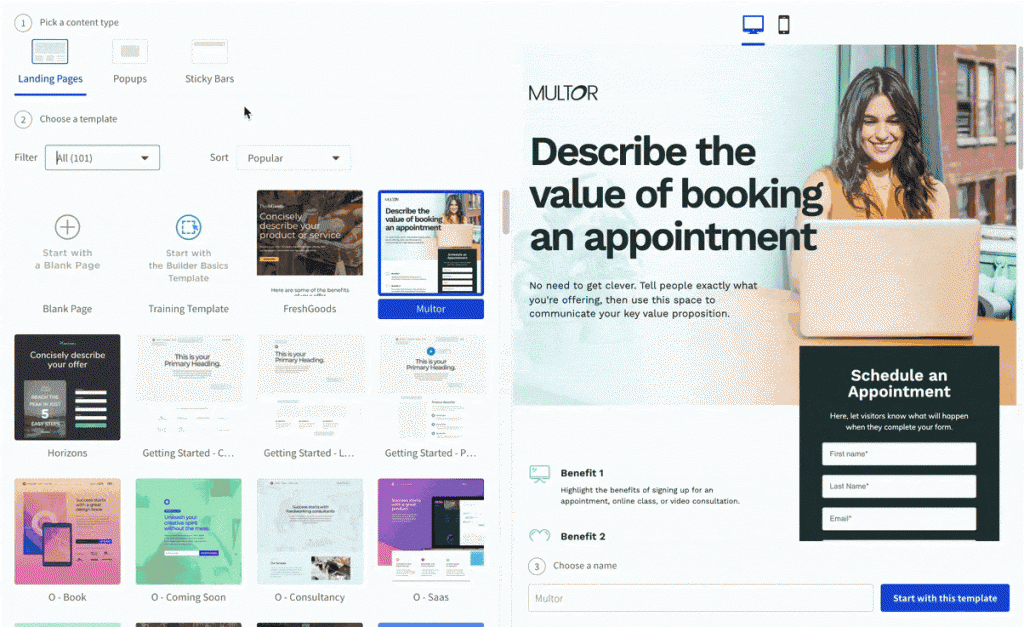
-
- You can switch between screen screenicon.png and mobile mobileicon.png in this preview area by clicking on the appropriate icon.
- Once you’ve chosen a template, Choose a Name for your template so you’ll be able to distinguish this page from other landing pages you might want to create later.
- Click the Start with this Template button to launch the Classic Builder. You’ve created and started your first page!
Adding and Editing Page Sections in the Classic Builder
- Adding multiple sections to your landing page is a great way to structure and organize your page content.
-
In the Classic Builder, you can add background images to your entire page sections, adjust their size and positioning, add background videos, and more!
Add a Page Section in the Classic Builder
- The Section sectionbutton.png Widget is the foundation for your landing page. To add a page section to your landing page, Drag and drop the Section sectionbutton.png widget to the center of the Classic Builder.
-
Expand and contract the Section borders using the guides positioned at every corner.Once you’ve added a page section to your landing page, you can proceed to add new elements to your page.
Editing Your Page Section Properties
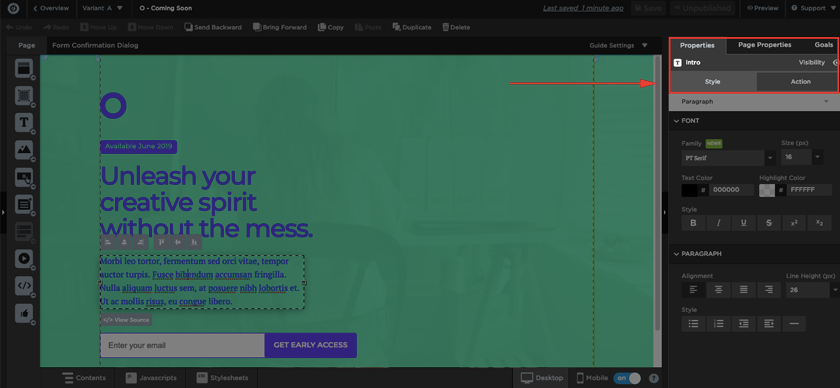
Once you’ve added or selected (single-clicked) a page section, you can edit your page section’s appearance by using the Properties tab on the right side of the Classic Builder:
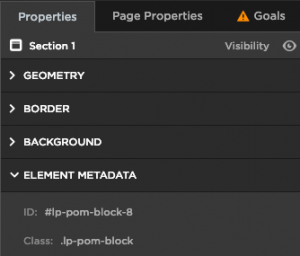
The Geometry Section
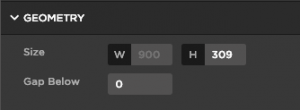
- Use the Size fields to adjust the Width and Height of your page section manually.
- Use Gap Below to adjust the space beneath the page section.
The Border Section
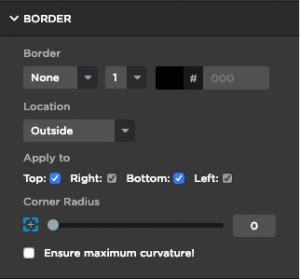
- Use the Border fields to determine the type, color, thickness, and location of the section’s border.
- The Corner Radius slider allows you round the corners of your section frame – click the + button to expand and round only certain corners, or select Ensure maximum curvature! to apply the roundest corners possible for the size of your page section.
The Background Section
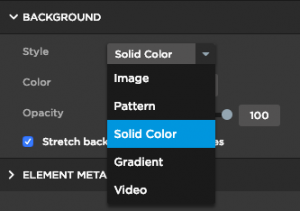
From the drop-down, select any of the following options:
Solid Color: Choose the color and opacity for the section’s background.
Pattern: Upload an image that will repeat and create a patterned effect for the background section. You can also change the position and tiling of your pattern by expanding the Advanced Settings.
Gradient: Select three colors to create a gradient effect for your section. Choose the base, top, and bottom colors to create your effect.
Video: Select a video source and play that video in the background of the page section.
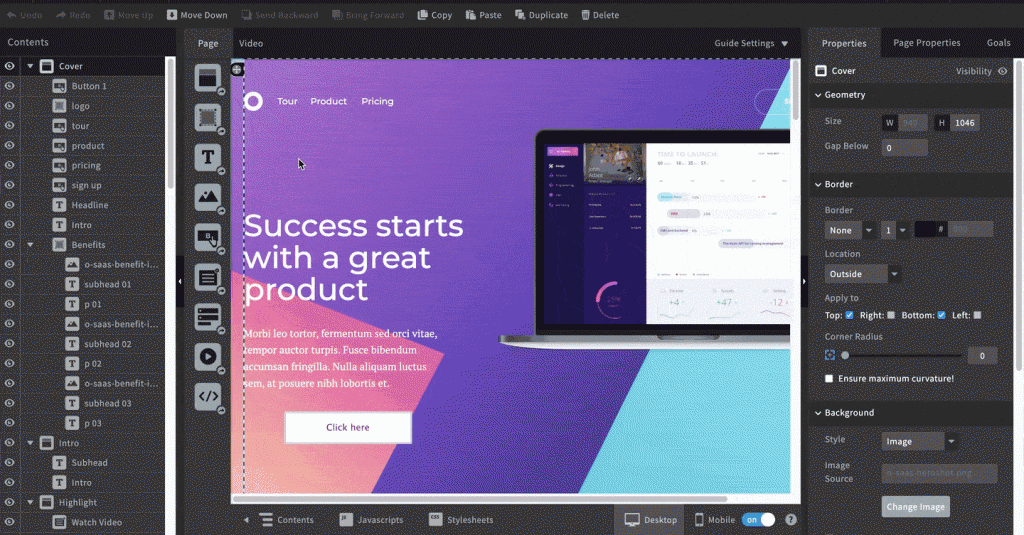
Image: Upload an image you’d like to use as the background image for that section.
Adding and Editing Text
To add a new text block to your landing page,
- Navigate your page in the Classic Builder.
- From the left-hand side controls, drag and drop the Text text_widget_button.png widget to the section of your page where you’d like to add your text block.
- A new text block will appear on your page, which you can edit further:

The buttons that run along the top of your text block allow you to shift your text block’s alignment in relation to the page section where you’ve placed your text block. - Double-click within the dashed lines to edit the text and type in your content.
You can use multiple text blocks on a single landing page and move them on the page as you’d like.
Customizing, Editing, & Hyperlinking your Text
- Double-click the text in the Classic Builder.
- Navigate to the Properties tab on the right side of the Classic Builder.
Adding image
- To add your first image, drag and drop the Image widget
 from the left-hand side of the builder onto your landing page; this will also launch the Choose Image dialog box:
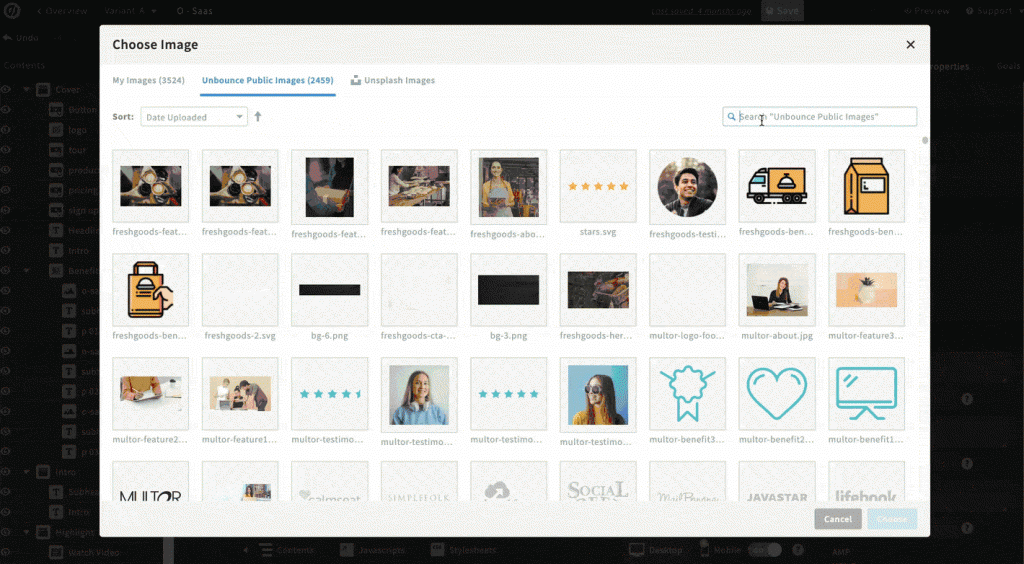
- There are three options for adding images to your landing page using the Choose Image dialog box. All options are available by clicking through the tabs at the top left-hand corner of the dialog box:
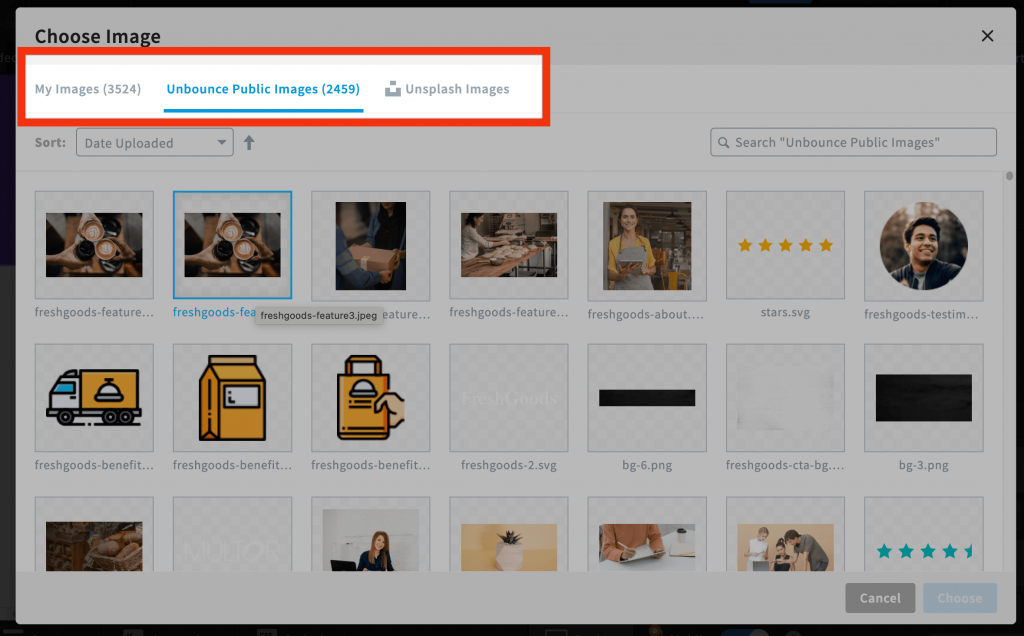
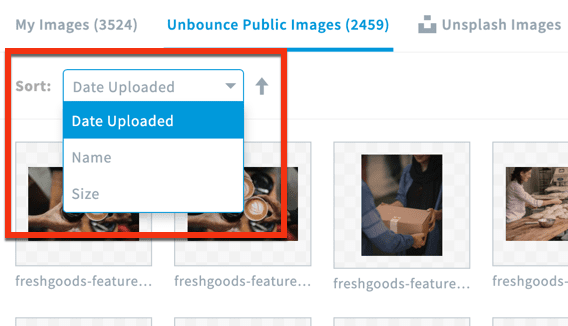
- You can sort through these images using the Sort drop-down menu in the top left-hand corner of the dialog box. Click the arrow on the right-hand side of the drop-down menu to toggle ascending or descending order:
- You can also look for specific images using the search field at the top right-hand corner of the dialog box.
- To add a selected image to your landing page, double-click the image or select the image & click the Choose button at the bottom right-hand corner of the dialog box.
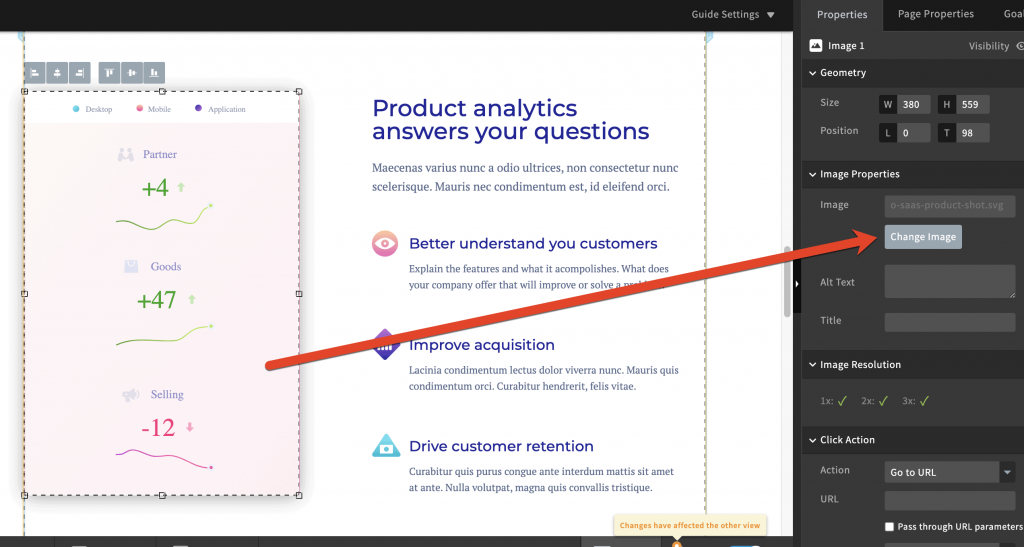
Replacing an Image
- Double-click the image to relaunch the Image Library, or
- Select the image, then the Change Image button from the Properties panel:
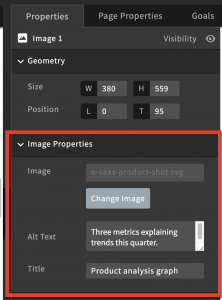
Adding Alt Text and Titles to Images
Uploading Your Images
In the Choose Image dialog box, click the Upload New Image button in the bottom left-hand corner of the page:
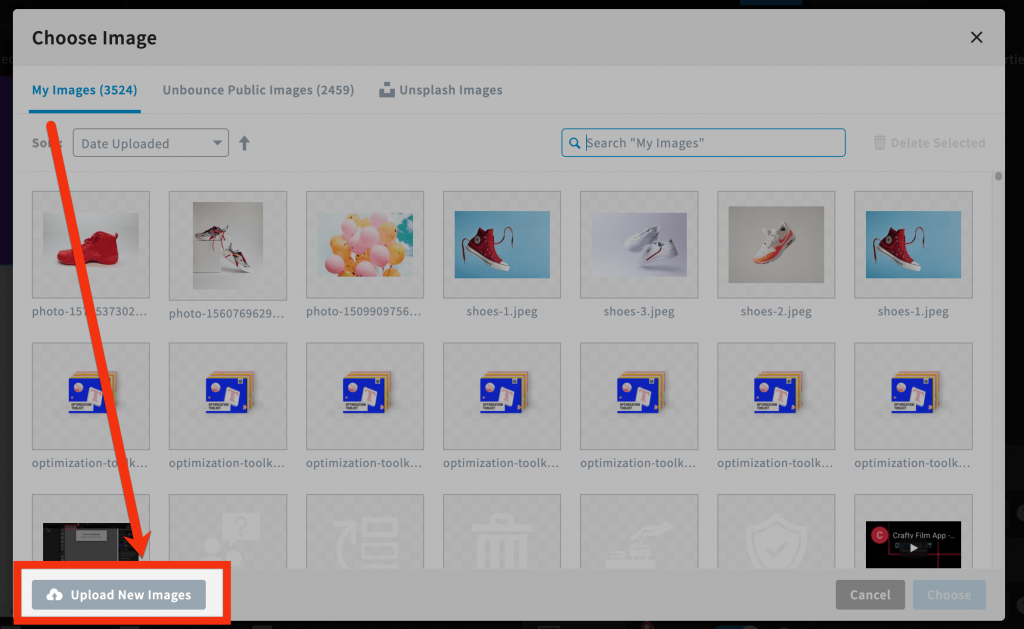
- Your operating system will launch a folder of your files & documents; search your files for the image you want to upload.
- Once you’ve found the image, click the Open or Select button.
- The image will appear in your Image Library in Unbounce.
- Select the image & click the Choose button at the bottom right-hand corner of the dialog box; the image will appear on your landing page.
Scale & Resize Your Images
If the uploaded image is larger compared to the size of your landing page or template, a dialog box will appear, alerting you of this size discrepancy:
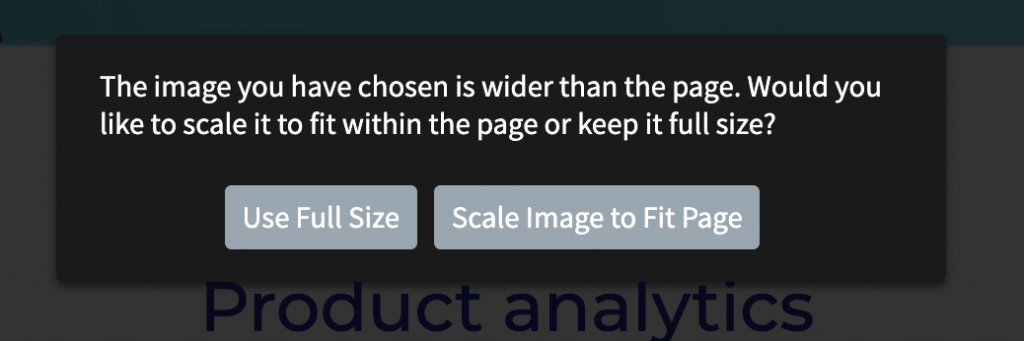
Use Full Size: This option will add the image to the page, regardless of size.
Scale Image to Fit Page: This option will scale the image smaller to fit in the confines of the landing page (in other words, to fit within the landing page’s width).
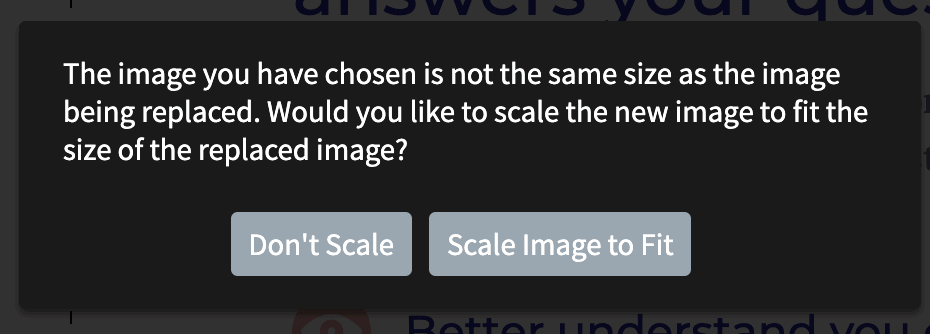
Don’t Scale: This option will add the image to the page, regardless of size.
Scale Image to Fit: This option will scale the image smaller to fit the same width and height of the image you’re replacing it with.
Select Multiple Images
- Hold down the Shift key on your keyboard to select multiple images simultaneously.
- While holding down the Shift key, use the left and right arrow keys on your keyboard to move the images:
Remove and Delete Your Images
Adding and Editing Buttons
- Navigate to the Widget Panel on the left-hand side.
- Drag and drop the Button
 widget to the section of the page where you’d like the button to appear:
The default button will appear on your page:

Setting up Button Click-Actions
- Select the button.
- Click the Properties tab on the right-hand side of the Classic Builder.
- Scroll down to the Click Action section:

Go to URL: The visitor will be redirected to a URL of your choice.
- Tick the option Pass through URL parameters if there are custom URL parameters or referral sources you wish to pass through with the button click.
- The Target field controls how the page visitor is redirected, e.g., a New tab or window will launch the URL in a new tab, whereas the Same tab or window will redirect the page visitor from your landing page to the chosen URL.
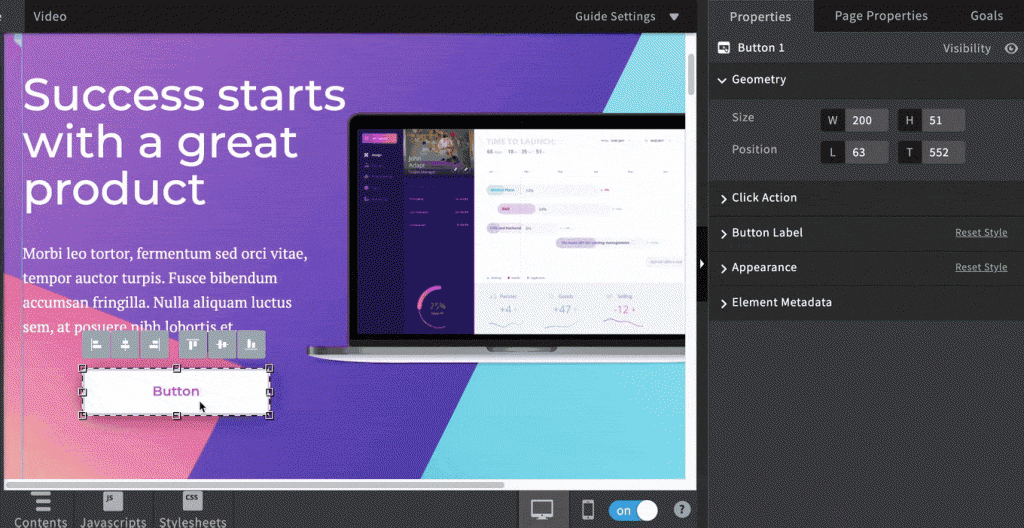
Styling & Editing Your Button with the Properties Tab
The Properties tab contains five sections that allow you to edit your button further: Geometry, Click Action, Button Label, Appearance, and Element Metadata.
- Use the Size fields to enter an exact numerical value in pixels for the Width and Height dimensions of your button.
- Use the Position fields to enter an exact numerical value in pixels to move your button to the Left of the page and the Top of the page.
Adding and Editing Forms
- Drag and drop the Form
 Widget from the left side of the Unbounce Builder to the place on the page where you’d like to add your new form. A new dialog box will appear.
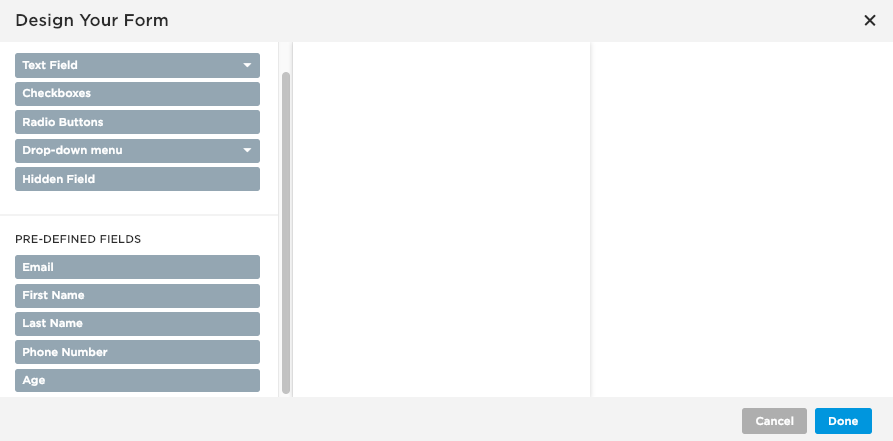
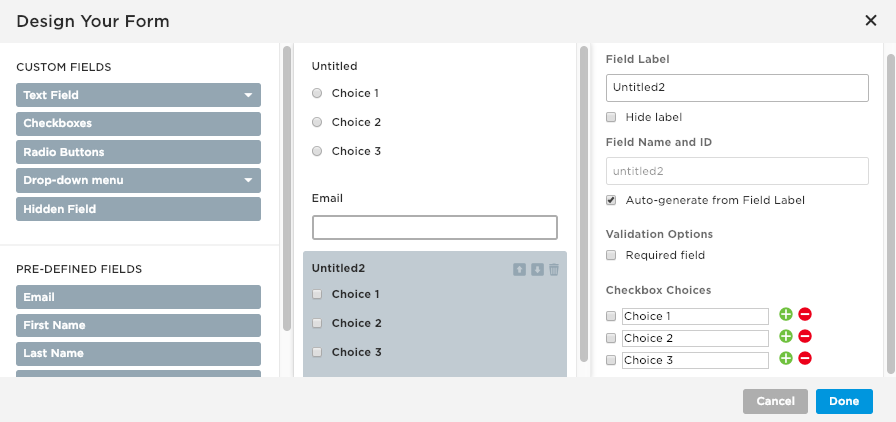
- Click on the form options left of the dialog box to populate your chosen form fields.
- A preview of your form fields will appear in the middle of the dialog box.
- You can change the order of your form fields or delete a form field by using the directional buttons or the garbage icon.

- Once you’ve clicked on a form field in the middle column, it will appear grey. You can edit the specific form field in the column on the right side of the box.
- If you’d like to make your form field required for submission, select the check box beside Required Field under Validation Options.
Once you’ve customized your form to your needs, click the Done button in the bottom right corner of the dialog box.
Editing Your Form Appearance Properties
Once you’ve selected your form fields and created your form, you can edit your form’s appearance by using the Properties tab on the right side of the Builder. Click on the form you’d like to edit to access the Form Properties tab.

The Geometry Section
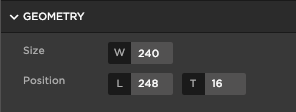
- Use the Size fields to enter an exact numerical value in pixels for the Width of your form.
- Use the Position fields to enter an exact numerical value in pixels to move your form in relation to the Left of the page and the Top of the page.
The Label Attributes Section
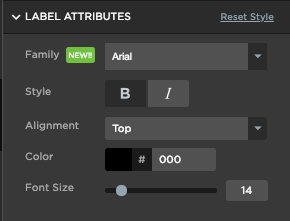
The Label Attributes section allows you to adjust the appearance of your form labels.
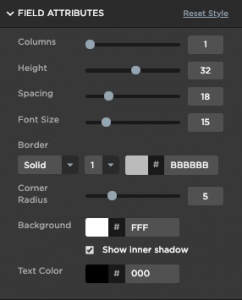
The Field Attributes Section
The Button Settings Section

If you want to manually set your form submission button placement, untick the Auto position submit button checkbox.
Adding Videos
- A video that you’ve uploaded to a 3rd-party video hosting provider, such as Wistia, Vimeo, or YouTube, and
- An embed code (iframe code format).
Embedding a Video via iFrame
To start, navigate back to your video hosting provider. Within the embed or share settings of the video hosting provider, locate an <iframe> embed code.
Copy the embed code, and navigate to the Unbounce builder of the page you’d like to add a video for.
1. Navigate to the page editor in the Classic Builder.
2. From the builder’s Widgets Panel on the left-hand side, drag and drop the Embed Video  widget onto your page.
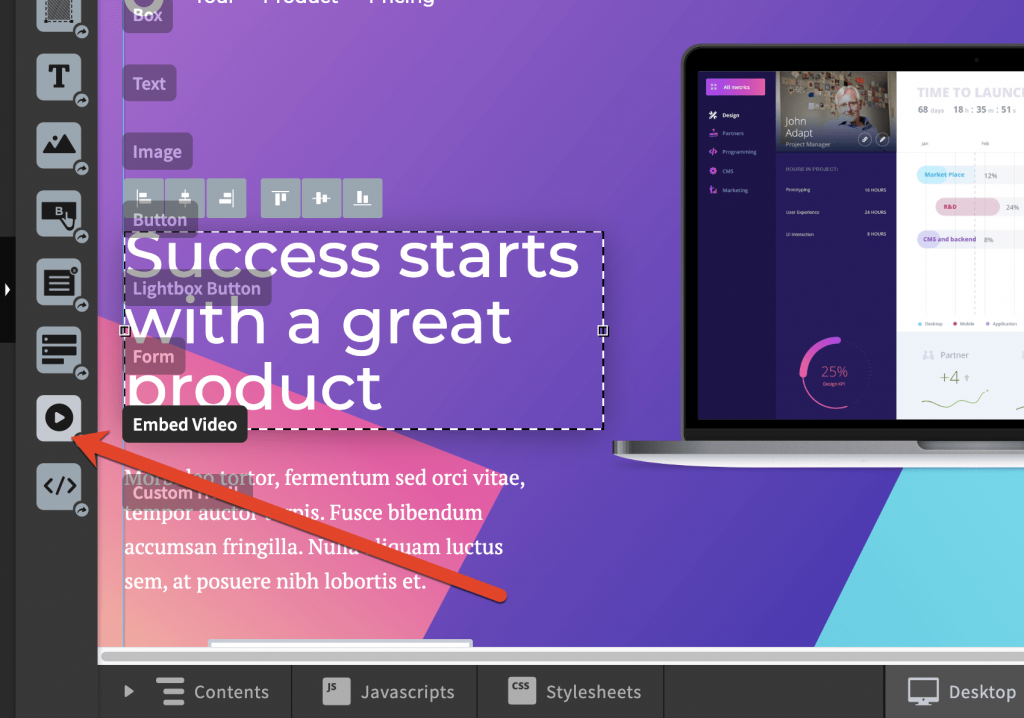
3. Be sure to place this widget in the space where you’d like the video to appear.
4. A new dialog box will appear.
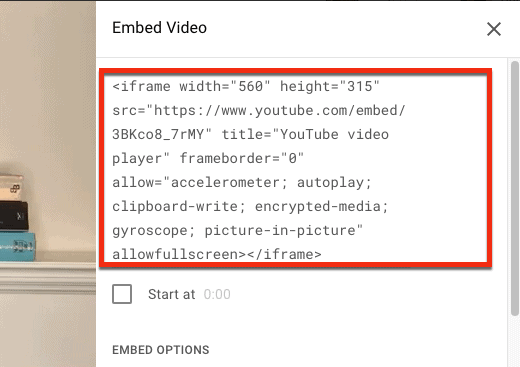
5. Paste the embed code from your video hosting provider into the Embed a Video dialog box:
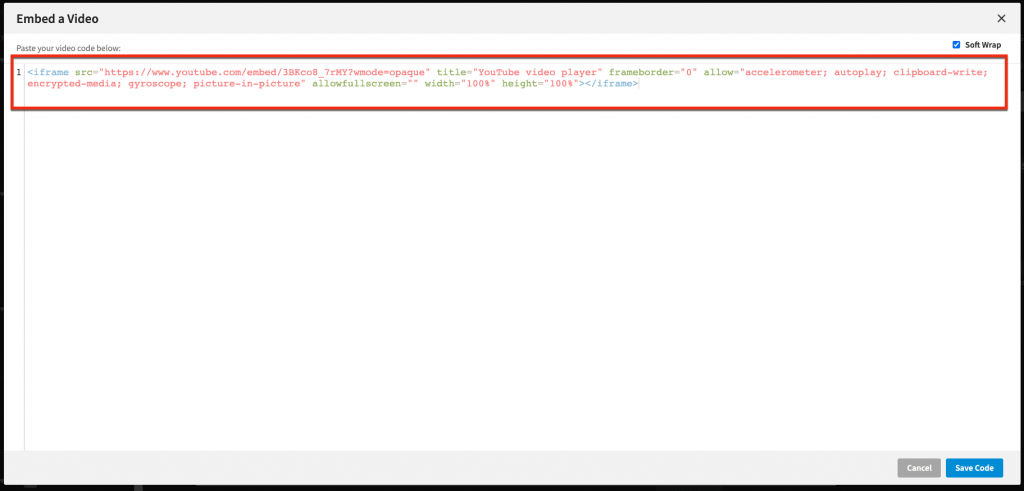
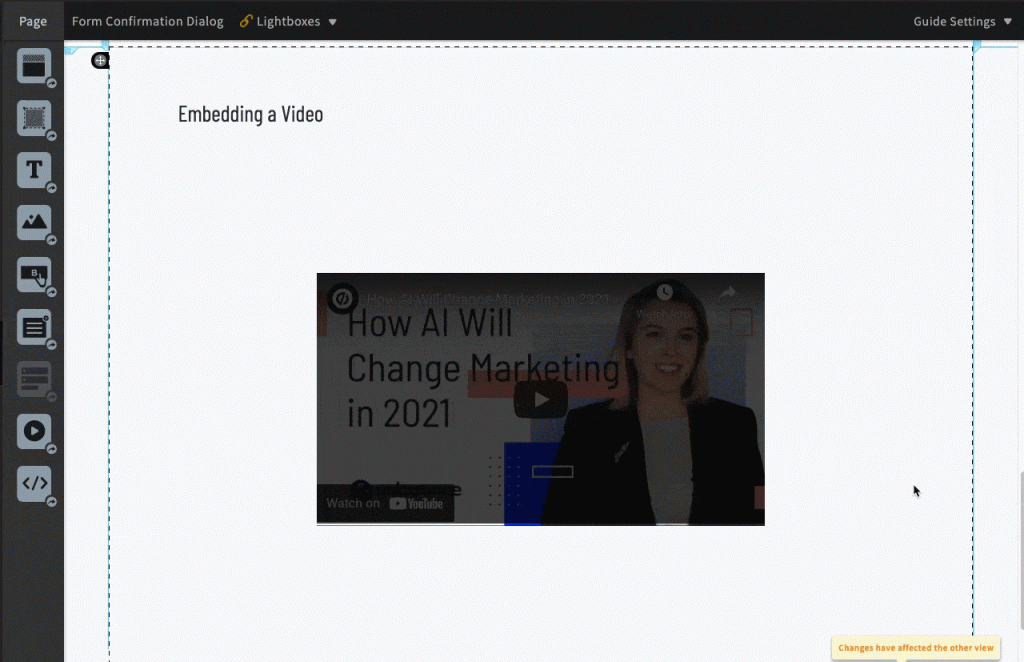
6. Click the Save Code button, and you’re all set! The embedded video will appear on the landing page.
You can manually change the size and position of your video by clicking & dragging the video using the resize buttons, allowing you to increase or decrease your video’s size to fit the dimensions of your landing page:
You can only test and view embedded videos on the live page (not in Preview or the builder itself).
Embedding a Wistia Video
When embedding a Wistia video, ensure the Embed Type is set to “Fallback”:
- Copy the embed code from Wistia and navigate to the Classic Builder.
- Drag and drop the Embed Video widget onto your page.
- Once you’ve pasted in the code, remove any <div> or <script> tags from the embed code, so all that remains are the <iframe> tags:
- Click the blue Save Code button, and you’re all set!
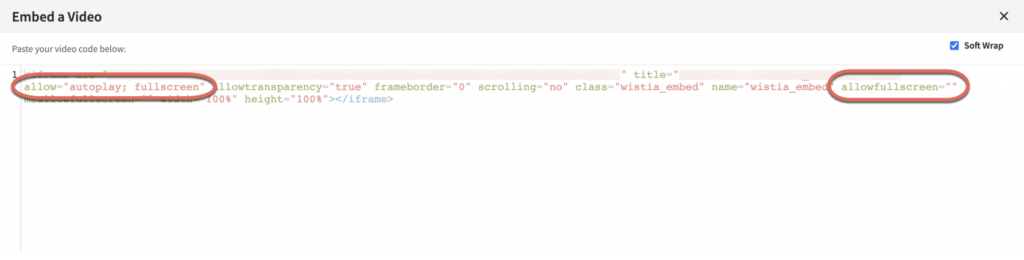
Enabling Full-Screen Options for Wistia Videos
When embedding your Wistia video, iframe embeds must contain allowfullscreen attributes for this feature to work. If allowfullscreen attributes are missing, then the fullscreen button will not appear.
You will also need to ensure that the attribute allow=” fullscreen” exists within the code, so that the fullscreen button will appear. See both attributes in the screenshot below:
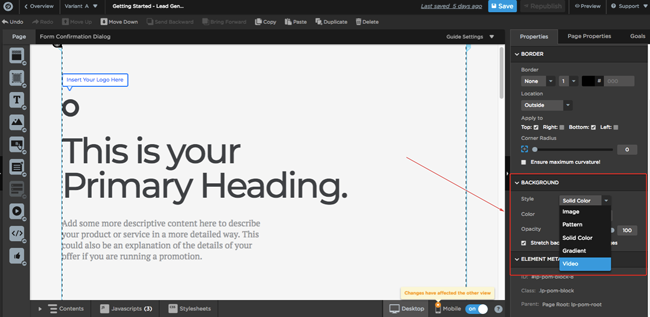
Adding Video Backgrounds
- Select the page section to which you want to add a video background.
- In the Properties Tab on the right side of the Builder.
- Scroll down to the Background section, and select the Style drop-down menu. Choose the Video option:
Paste your video URL in the Video URL field and press Enter on your keyboard to save
- To preview your video background, click the Save button at the top right-hand corner of the screen, then click the Preview button.
- A new window will open with a preview of your video background.
- Back in the Classic Builder, click Publish or Republish to publish your page.
- You’re done!
Video Content and the Mobile Experience
Only certain mobile devices can support Adobe Flash-friendly content. To ensure video content works on most devices, avoid using Flash.
Video backgrounds aren’t the best experience on mobile devices. When you add a video background to the desktop version of your page, the system will, by default, display a static image from your video on the mobile version of your page. Therefore, we recommend straying away from background videos for the mobile version of your landing page.