Protect WordPress login using AWS WAF – Web Application Firewall
AWS re:Invent has already begun and keeping in mind security of your applications in the cloud, AWS has launched a new service called AWS Web Application Firewall. This service is intended to secure what you share on the world wide web via AWS CloudFront. Making the experience for the user better with more security is what AWS has always aimed for.
AWS WAF allows you to create your own set of rules to block most common attacks on Web Applications such as SQL injection or cross-site scripting etc. You need to specify the rules and just associate the set of rules to your AWS CloudFront Distribution. The set of rules are also called web ACL. AWS WAF also gives you a deeper monitoring of the traffic.

Use-case
I have a PHP application running on EC2 in a load balanced environment. For better content delivery globally, I have also used AWS CloudFront. Recently there were hits from a lot of unknown IPs on the wp-login.php page of my website. I was trying to figure out what to do and how to prevent unwanted logins to wp-admin of my PHP blog website. The URI is actually wp-login.php which opens up wp-admin page. I decided to use AWS WAF – Web Application Firewall and give it a try and so far it seems good. I have setup a basic WordPress website for demo purposes of this blog and will try to allow only few IPs to be able to access wp-login.php.
Workflow of AWS WAF
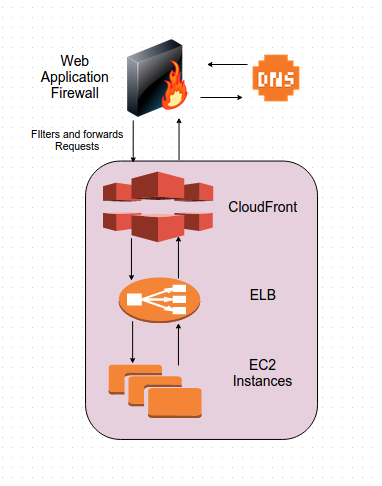
Steps
What we will be doing is creating conditions as per requirement, adding them to rules and then finally adding these rules to web ACL in the AWS WAF service. After this we would need to associate this ACL with the CloudFront Distribution we want it to work for.
1. Open the AWS WAF console and go to Create new ACL:

Just enter a name for your new web ACL. I have used demo for this demo. Just click on next and go to the Create conditions step.
2. In this step, we will create 2 conditions. One for IP and the other for the URl string matching. So, firstly click on Create IP match condition.

After this a window will pop out as below:
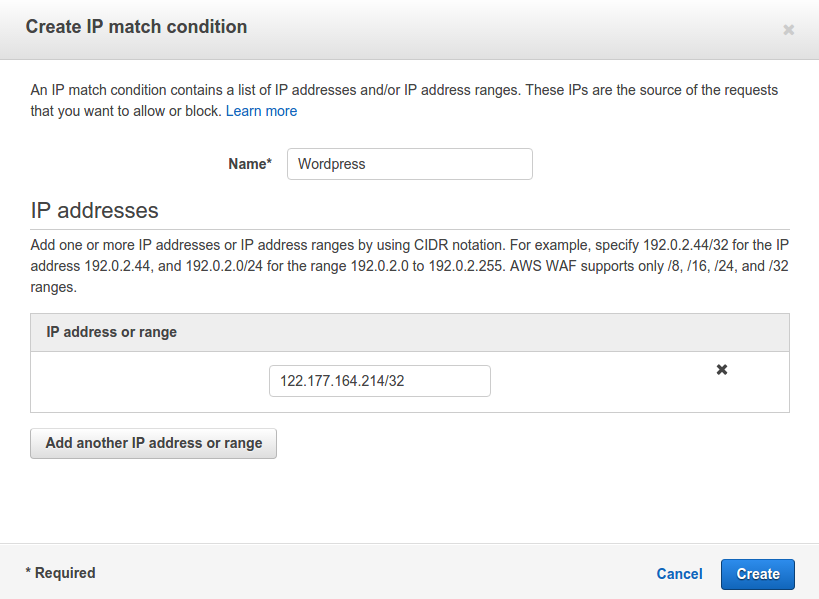
Give a name to this condition. I have named it as WordPress. Also, enter the IP addresses or IP address range for which you want to allow access to the wp-login.php page. Click on Create. It will return a message on the console like:

Now, Lets go ahead and create a URI string match condition and we will check for the wp-login string. Click on Create string match condition.

After clicking it will pop out something like:
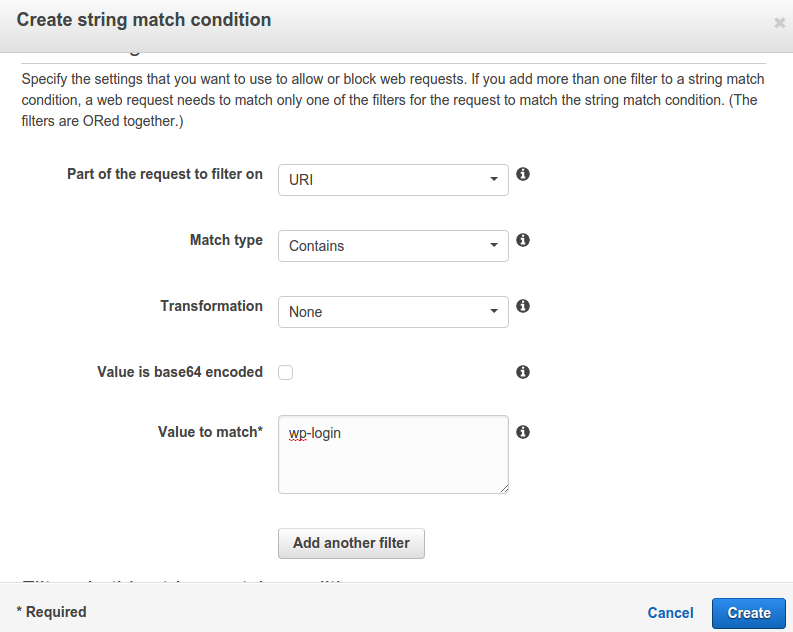
Give the condition a name. Select the options as above and in the Value to match text enter wp-login. Just click on Create. It will again show a message on the console like:

Click on Next on the the right bottom corner. Now, that your conditions have been created lets apply them to rules.
3. Time to create rules. We will create 2 rules. One – whom to allow access to wp-login.php and Two – whom to deny access or block. Click on Create rule.
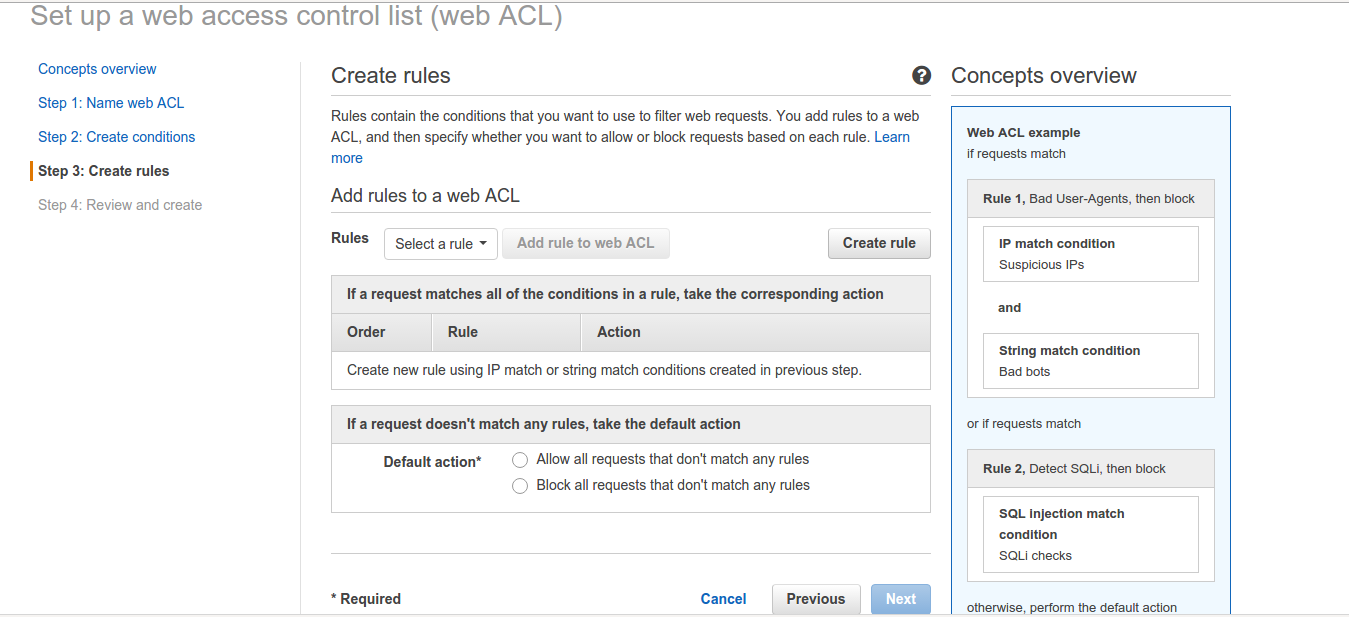
You will get the following windows. Here, name the rule as wordpress-rule-allow to make things clearer and add the following conditions to it for IP as we don’t want to block any requests from this IP. Also, it will create a CloudWatch metric with the same name. We can also do without the allow rule as by default all IPs will be allowed to access wp-login.php. Just filtering the IPs not in the IP condition in step 2 will also do our job.
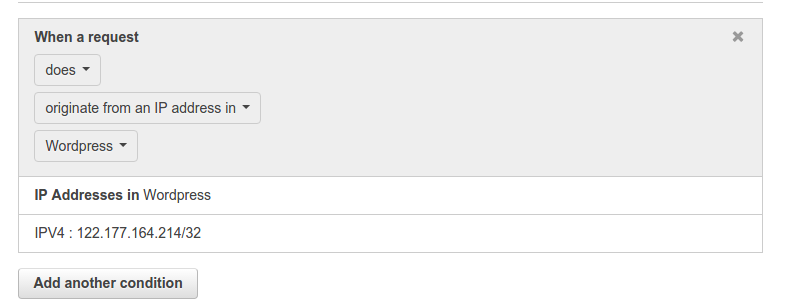
Click on Create. Now, it will redirect you back to the console. We will select allow this rule as below:
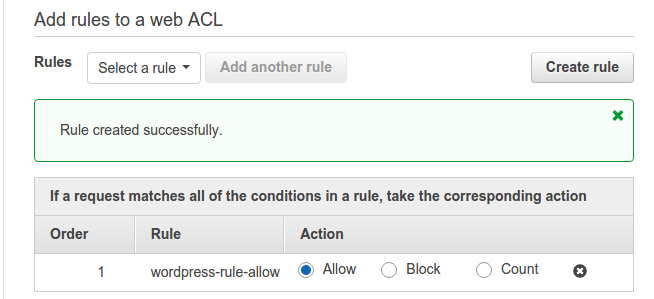
Now, comes the block rule. Click on Create rule again. Name the rule as wordpress-rule-block-all. Now, you need to add the following two conditions:
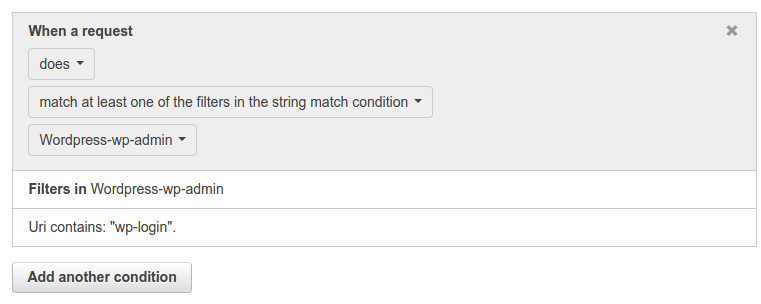
and
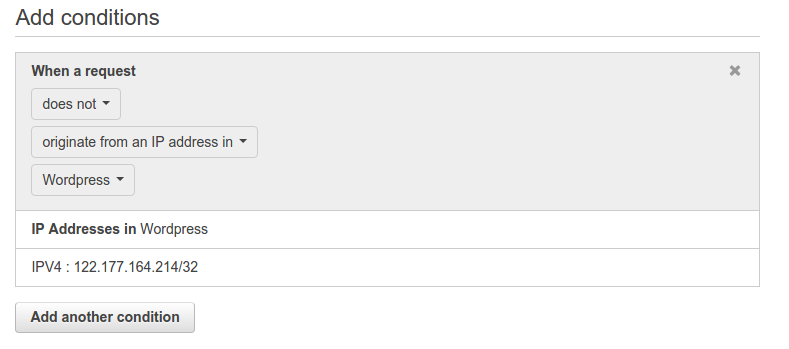
Just click on Create. What the second rule will do is that it will check for the client IP address who is making the request matching string “wp-login“. If the IP is not the one specified in the IP address condition we created in step 2, requests to the URI will be blocked for that client. Below is what the rules for this web ACL will look like:
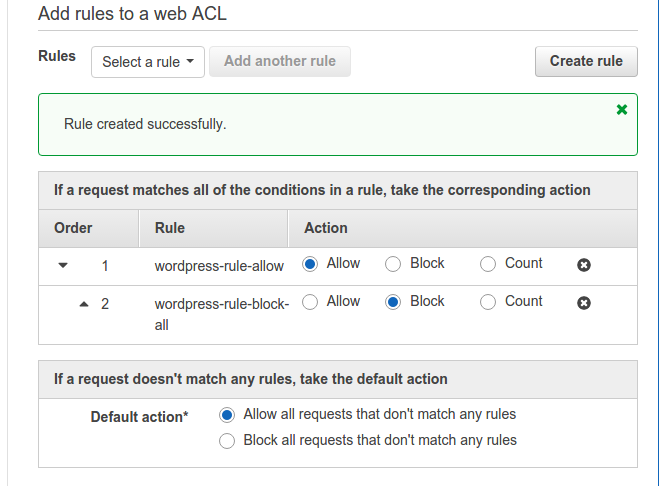
Default action is “Allow all requests that don’t match any rules” else it will block all requests from any client IP. It seems quite obvious.
4. Now, is the Review and create step. Review the config and select confirm and Create:
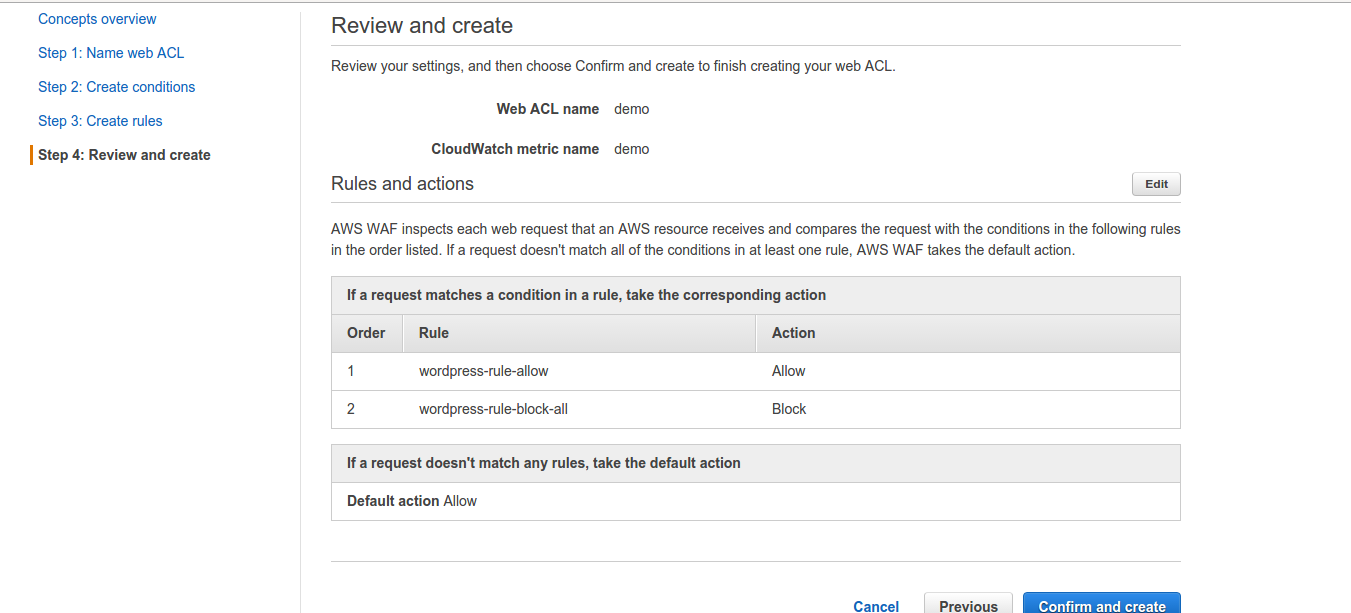
5. The web ACL will be created and listed as below:

You can see the details of requests in the requests tab later when traffic starts flowing. You can edit the web ACL with the “Edit web ACL” as well. REMEMBER: to change the order – make block rule as rule number 1. Now, you need to add this ACL to CloudFront and test. In the Requests tab you can see the traffic and allowed/blocked IPs. Also, there will be a link which will take you to the CloudWatch metric.
6. Go to AWS CloudFront and select the Distribution settings for the Distribution you want to apply the ACL for. In my case I will select the WordPress one and then click on Edit inside Distribution Settings.

Select the ACL you just created. For me its demo. Then click Yes, edit on the bottom right corner of the screen.

Your CloudFront Distribution will show “In Progress” under Status. Once it is Deployed we can go ahead and test.
7. So, lets test. I have changed my IP by connecting to a different network. Now, opened the wp-login page while connected to this network and got the following error:

Lets connect to the network I allowed the login page for:

The login page opened:
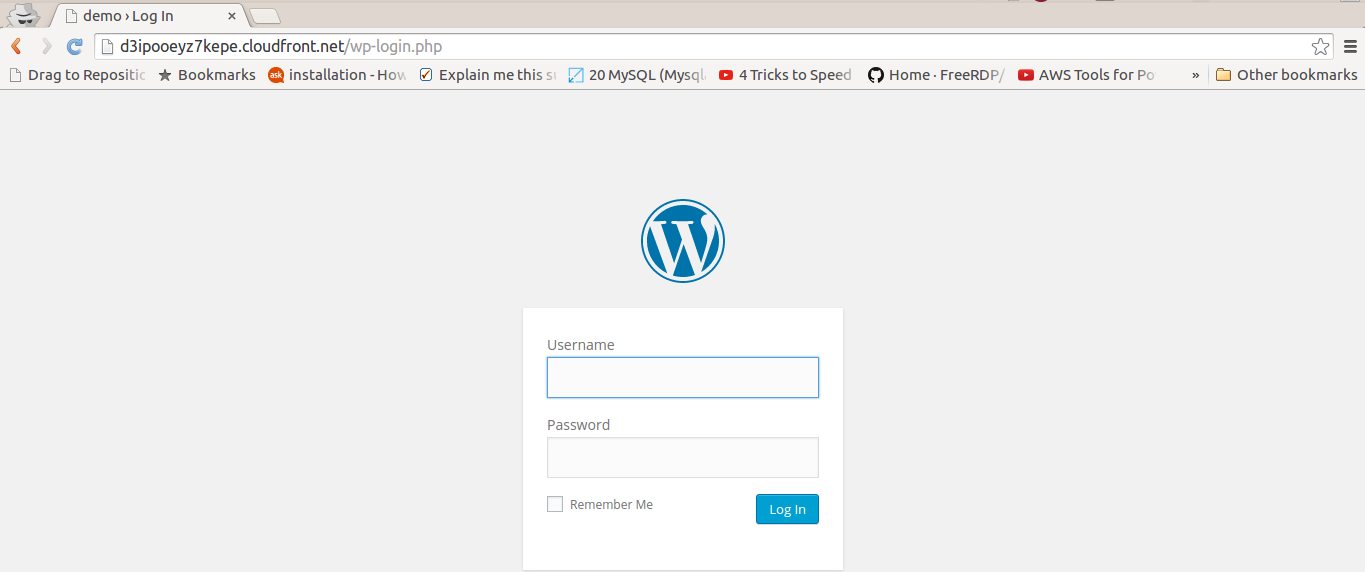
So, yes, it worked. I am thrilled to use this service. I have already put it to use on UAT and will be proceeding to put it to use on production soon. You can use any string or IP as per requirement. This service indeed looks promising. In my next blog on AWS WAF we will discuss some more use-cases. Be tuned in to my blogs and follow me on twitter @ranvijay


I’m stuck in a situation where my deployed Elastic Beanstalk environment deployed through the console is stuck with the Classic Load Balancer… It doesn’t seem to be an option to switch this to ALB or redeploy with ALB outside of EB CLI. I think what I’ll do is attempt to redeploy the environment with EB CLI, deploy it with a current snapshot of the RDS, and specify ALB… Then I got to see how my DNS needs to be updated.
Hello Ranvijay. Thank you for the how-to but isn’t the wordpress-rule-allow rule redundant? Wouldn’t the same behavior result from just the wordpress-rule-block-all rule and the Default Action of ‘allow’? Since there is a small charge for each rule this could be significant, even if only slightly.
Very helpful Ranvijay! I look forward to other use cases like SQL Injections or just bad web requests. Thank you!
You’re welcome Luis. I will definitely have a blog on something like that soon 🙂 You can follow me on twitter @ranvijayj